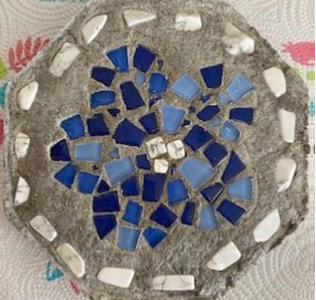
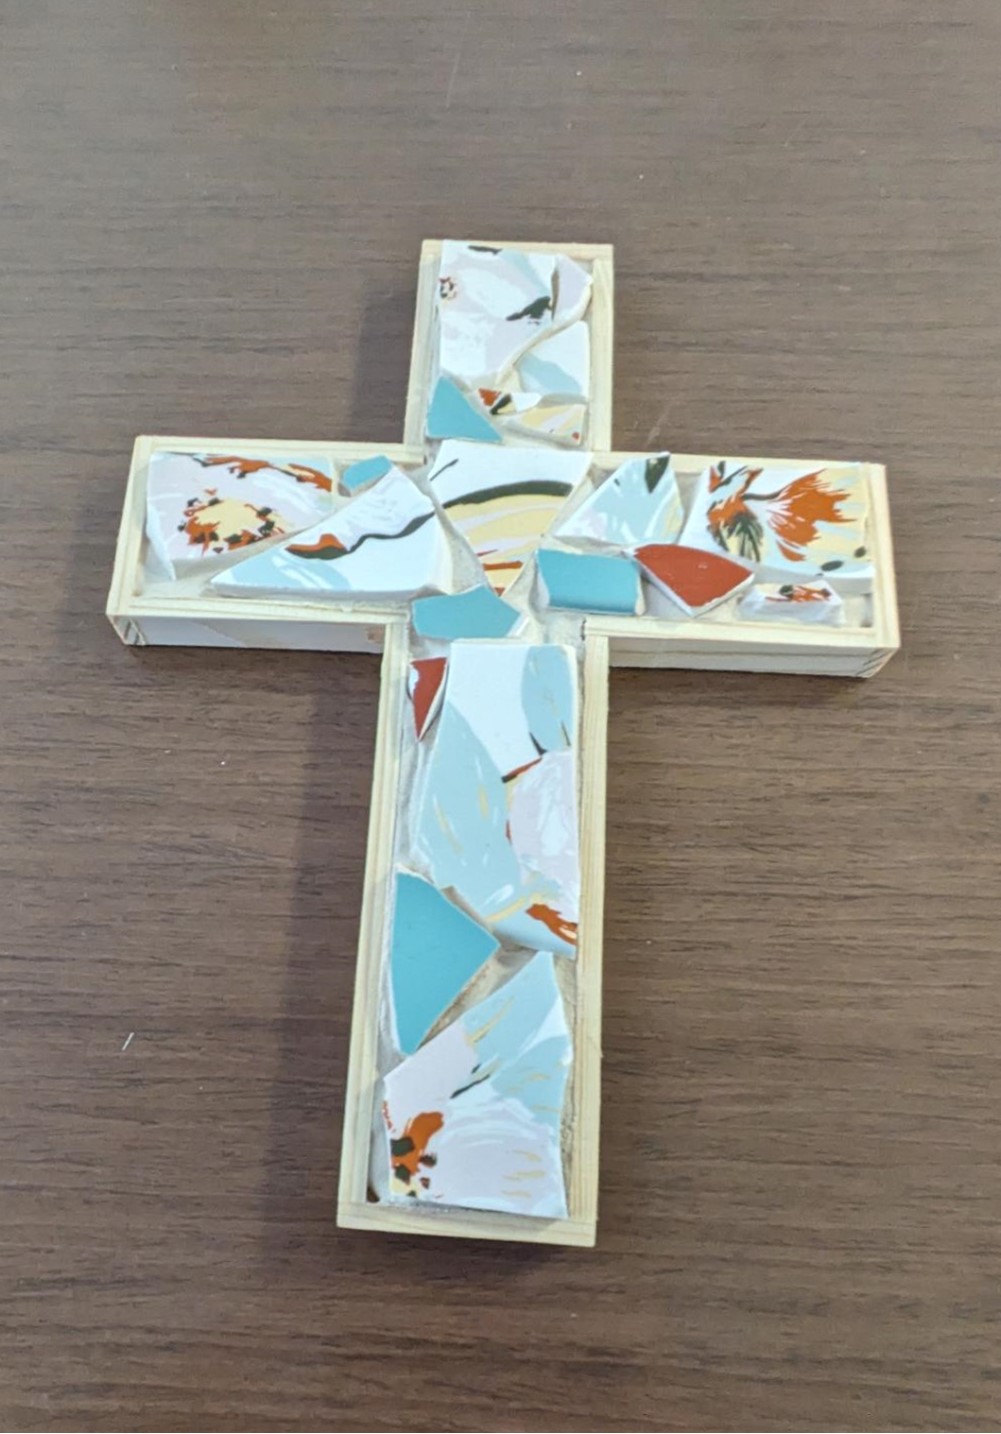
November 2023 Craft: Gratitude Cards

By Captain Jennifer Swain
Administrator of Program
San Diego, CA Adult Rehabilitation Program

Supplies*:

  • 8.5x 11 watercolor paper
  • Crayola watercolor palette
  • Blue painters tape
  • “Thank you” stamp
  • Ink pad
  • Glass of water
  • Paper towel
  • Plastic tablecloth

*Most supplies can be purchased inexpensively at Amazon or the Dollar Tree!

How to…

Cover your surface with a plastic tablecloth to ensure paint does not get on your work surface. Cut watercolor paper in half (vertically or horizontally) then fold in half to give the look of a greeting card. Open paper and lay flat. Place a piece of painters tape along the folded seam to ensure paint does not bleed.

Pick a color from your color palette. This will be your focus color. Wet your brush and dip it in the color you’ve chosen. Once you’ve wet the paint, make three matching paint puddles on the inside of the lid. Rinse your brush and add a small amount of black to one of the color puddles. Rinse your brush again and add a lighter color of paint to one of the two remaining color puddles. At this point you should have three shades of paint.

Starting close to the painters tape, and using the darkest shade of color, brush the paint left to right. You’ll want cover about one-third of the card surface space. Without rinsing the paint start using the next lightest shade of paint on the middle third of the card. You will want to blend the colors together where they meet to create the effect of shading. The lightest color should be at the based of the card and be blended with the center color.

Allow the paint to dry, gently remove the painter tape, and then stamp with your “thank you”. Write a personal note inside and give to someone who blessed you! This kind of tangible gratitude blesses the one who receives, and the one who gives, it!

“In everything give thanks…”
1 Thessalonians 5:18 TLT

October 2023 Craft: Sabbath Smash Book

By Captain Amber Ohl
Bozeman, MT Corps – Intermountain Division

For me Smash Books are just a more beautiful journal. I think of it as a doodle pad, journal, maybe even a scrapbook; but it doesn’t have a set plan. It can be messy, it could be overstuffed, and most of all, it doesn’t have to be perfect.

When it comes to Sabbath, we might be stuck in the idea that it is a rigid day of rest with all these rules and such. But Sabbath is a day to focus on who God is and to be able to be refreshed. That is my hope for this smash book, that we are able to compile all these different amazing ways to be able to focus on God, but also to refresh ourselves. One of my favorite examples is found under the “T” section and that is take a nap, listen. Sometimes we just need a nap.

1. Gather some supplies. I recommend that the journals would be an 8 1/2 by 11 size. Michaels is a great place to get them as they are either on sale or you can find a coupon through their rewards app. Other supplies include the printable pages attached, scissors, mod podge, brushes, scrapbooking paper, stickers colorful pens, wasabi tape, and anything else that your women might light. This might be a good time to clean out some drawers or leftover art supplies.

2.With this activity, they can work at their own pace. It’s easy as explaining what to do and let them have at it. They can cut out the letters to the word “SABBATH,” some of the ladies just did a rough cut, while others cut on the lines; both works. I would encourage that the letters are placed about 10 to 15 pages apart. This will allow for when they do engage in their Sabbath activity provides that extra space.

S – Sing/Songs. Write lyrics that help you connect you to God

A – Attributes. What are the attributes of God? OR A – Actively Rest. How can you actively rest?

B – Bible – Book by Book

B – Be in Nature

A – Art. Doodle in these pages while spending time with God, search online for Bible art that can be pasted in these pages to color, or pick up a craft that you have not done in a while.

T – Take a nap. Talk with a friend.

H – Hobby. Whether it is a hobby that you have not done in a while or it’s something you wan to try.

3.One thing we did was add an envelopes so that we could use that to tuck away some small notes or cards.

4. I added extra pages that are some examples of a word to associate to each letter of “SABBATH.” I would encourage your ladies to add in their own that would help them on their Sabbath.

5. Also, Pinterest is a great resource if you ladies would like some extra pages. Maybe they want to add in some coloring pages or look up verses to color.

6. Remember it does not have to be perfect; that is what’s fun about smash books!

Prayer for you: For this moment of Sabbath may God help you engage in true Sabbath rest. May you unattach from the daily burdens and the concerns that are yours. May you pause long enough to pray, be present enough to enjoy, and slow down enough to rest. But most of all, I pray that you may worship the One who gives us Sabbath.

Download a printable version of these directions. It has also has extra printable pages and quotes to include in your Sabbath Smash Book.

September 2023 Craft: Lamp Shade

By Major Gaylene Yardley
Divisional Women’s Ministries Secretary – Southwest Division

This month’s craft is a little different. No written directions, but Major Gaylene has created a video of how you can make a lamp shade from old slides.

This month as we focus on flourishing in the battle season, we need to never forget that the light defeats the darkness.

The light shines in the darkness, and the darkness has not overcome it. John 1:5

68

69-

70

71-

72

73

74-

75

August 2023 Craft: Desert in a Bottle

By Major Noelle Nelson
Divisional Women’s Ministries Secretary – Golden State Division

The desert has a lot of beauty. The shades of red and orange, the cliffs, cactus, various trees, plant life, and the variety of animals may come as a surprise! There is more than meets the eye. This craft will allow you to enjoy the beauty of the desert, and even take it with you, without having to brave the heat.

PREP TIME: 10 minutes

ACTIVE TIME: 1 hour

TOTAL TIME: 1 hour 10 minutes

Materials

  • Empty clear glass bottle or container
  • Funnel (you can make one with paper taped together into a cone)
  • Various kinds of sand (try to pick distinct colors or textures – from
    outside, the craft store, etc.)
  • Small clippings of desert-type plants, or bits of rough shrub
  • Small rocks (make sure they will fit through the opening of your bottle)
  • Paper towel, plastic wrap, & tape to create stopper (if your container
    does not have a stopper or lid)

Tools

  • A bamboo skewer to move items around in the bottle (remember, the opening is small)

Instructions

  1. Gather all your materials. If working indoors, work over a shallow box or newspaper to catch all the sand and clippings.
  2. Funnel in your sand. If you have gathered sand from outside, made sure to sift out any debris. To create slopes, tilt your funnel to one side for one sand color then fill the gap with the next sand type. You can also use the skewer to swirl the colors together.
  3. Continue to create sand layers, adding pretty decorative rocks between the layers. NOTE: the rock layers need to be thick so the sand won’t cover them.
  4. Keep going until the neck of the bottle starts to get smaller.
  5. Add plants, small colorful rocks, and other treasures! Use the skewer to position them.
  6. Stop the bottle and treat it gently! Fashion a stopper using some paper towel. Cover over tightly with a piece of plastic wrap; secure with clear tape. If you have to transport it, try to make sure it stays level! Too much motion could cause the contents to get mixed together.
  7. Enjoy your Desert in a Bottle!

Download a printable version of these instructions:

June 2023 Craft: Seasons May Change Painting

By Captain Heather Pope
Divisional Women’s Ministries Secretary – Alaska Division

This is the perfect project to remind us that even though things around us may change, God’s love is steadfast and true. He is with us through each and every moment. In times of uncertainty we may cling to Him and find peace.

First you will need to choose a piece of paper or a canvas to paint on. The paper in the picture is a 12×12 piece of cardstock. You will then use painters’ tape or any other tape that is easy to peel off. Put a piece of tape around each of the four sides. I used a wider piece on the top to leave enough space to write after painting. Now use thin pieces of tape to section off the paper into four equal parts.

Choose four colors that you would like to use to represent each season. I chose to use darker colors at the top and then gradually fade into lighter tones. You can lighten the dark colors by adding a little white paint. Acrylic paints worked the best.

Next you will use black paint to paint your tree with branches. Don’t worry about making it perfect. Once you add the leaves in the next step it will look great.

Now is the fun part, you get to paint the different seasons on their branches. Add flowers, green leaves, a bright sun, fall colored leaves and lots of snow.

Once your masterpiece is dry, remove each piece of tape to reveal your four sections of seasons.

Now you can add your favorite quote or scripture that will reflect how God never changes.

Download printable instructions of this craft:

May 2023 Craft: You Turn My Mourning Into Dancing

By Commissioner Debi Bell (Retired)
North West Valley, AZ Corps – Southwest Division

Note: This can be used as a Mother’s Day or Women’s Tea Craft.

You turned my mourning into dancing. You removed my sackcloth and clothed me with joy, so that my whole being may make music to you and not be silent. O Lord my God, I thank you forever.
Psalm 30:11-12 EHV

Every major holiday is a mixed bag of emotions for people. They bring joy and sorrow depending on the life experience of the individual. Mother’s Day is especially hard for those who have lost their mothers, were not blessed to have been mothers or have been hurt by either a mother or child. The majority of people are celebrating and enjoying the day and nobody wants to take away from their joy. It is important to recognize there are women and men in your congregation and groups that will be grieving the loss of mothers, children, and the opportunity to be able to enjoy either. Personally, Mother’s Day is awkward for me during the gift giving time when they ask all the mothers to stand so gifts can be distributed. I do not stand because I was not able to give birth to a child. Then the gift distributers are confused because they do not know my story. Would it not be easier on all to have all the women stand give them a gift no questions asked? It should be the same for the men on Father’s Day. Then nobody is publicly humiliated because of an empty womb or an empty nest.

This craft is one that can be adapted in so many ways to suit the needs of a group and their age or ability. The basic idea is from Pinterest. Credit has been given and the website is listed so that you can go see the pictures to get even more ideas. Following the craft instructions are ideas on how you can adapt the craft for your needs.

This Ballerina Craft Idea is from Pinterest. https://www.thebestideasforkids.com/

You can get free ballerina silhouettes from this web site and adapt different tutu materials or use the coffee filter idea below depending on how sophisticated you want the cards and what age your craft group. These would make great table favors for a Mother/Daughter tea. Program cover idea as well. Go to The Best Ideas for Kids to see pictures and a video demonstration.

Adapt this idea for your purpose.

Supplies Needed to Make a Ballerina Silhouette Craft

  • Liquid Watercolors
  • White Cardstock or Watercolor Paper
  • Coffee Filters
  • Free Printable Ballerine Silhouettes from Best Ideas for Kids

How to Make a Ballerina Silhouette Craft

  1. First, print off the ballerina silhouette templates on your white cardstock. The template is available to subscribers as a gift.
  2. Once you have your printouts, apply a light color wash to your paper, and then let this dry. You can use regular watercolors or we prefer liquid watercolors. With liquid watercolors, you can use just a little drop with water and dilute the drop of color as much as you want.
  3. While your paper is drying, you can decorate your coffee filters with watercolors. Lay out some wax paper to protect your surface for this step. Apply two different color watercolors to each coffee filter. You can paint with brushes or use droppers to drop the colors on the coffee filters.
  4. Your coffee filters will need to dry overnight. Let them dry on a paper towel over your wax paper.
  5. Once dry, fold over until you get a triangle shape. Then cut off the tip to match the size of where you are going to place the ballerina’s tutu.
  6. Get another coffee filter and make it the same size.
  7. Now glue the coffee filters to your paper and you are done! We left the top coffee filter flat but you can also flare this a little bit to create a more ruffled look.

How to adapt for your groups’ needs:

Add a complimentary color of ribbon around the waist of the coffee filter tutu for an extra flourish.

Use tulle and ribbon instead of coffee filters.

To complement the program covers, table favors, you can purchase bud vases from a discount store, glue colorful tulle around the middle of the vase, and add a complimentary ribbon. Put cut flower bouquets into your “ballerina” vases.

Use the ballerina silhouette as clip art if you are going to make program covers, table favors, or greeting card using the theme, “You Turn My Mourning into Dancing.” You can also go a different direction by changing the spelling of mourning to morning. (You Turn My Morning into Dancing.) The theme is about dancing and joy when you make that change. (Did you dance for joy this morning?)

With this theme, you can use silhouettes of many kinds of dancing where there is some kind of skirt or costume. The ballerina idea is easy and easy to adapt by using different costumes. Celebrate different cultural dances by using material to look like the Jalisco dress from Mexico, the Hanboc from South Korea, Clogging, or Square dance dresses, Mumus from Hawaii, Grass skirts, Dashiki from Africa, Vyshyvanka from Ukraine, and you get the idea.

You could have a monthly program feature of different cultural dances using the theme “You Turn My Morning or Mourning into Dancing.” Each month features a different dance costume. Tell of its history and learn a few steps. Feature food from that culture. If anyone in the group is familiar with the costumes because it is their culture or they lived in the country, have them share memories. Learn a few steps from the dances if you are able to do so.

Have fun and make memories. Share the joys and sorrows of your group members so that all can acknowledge that God does turn our mourning and our mornings into dancing when we give Him permission.

Download printable directions for this craft:

April 2023 Craft: Floral Letter Decoration

By Lt. Stephanie Philpot
Inglewood, CA Corps – Southern California Division

Spring is near, and it is almost time to bring out the spring décor. Floral letters are a great way to bring a pop of color into our homes, and together we are going to create something beautiful. The best part about this project is majority of these supplies needed can be found at your Corps/ Home League closet. If you are unable to find these supplies you can easily find them at your nearest Dollar store, Michael’s, or Hobby Lobby.

Materials Needed
⦁ Wood letter of your choice or if you want you can trace out your letter from carboard/foam board.
⦁ Faux flowers, colors of your choice
⦁ Scissors or wire cutters
⦁ Glue gun
⦁ Ribbon or picture frame command strips

Instructions

Step 1: Get your wood letter and let’s get started! however if you do not want to purchase one. You can cut out your desired letter using carboard or foamboard.

Step 2: When using faux flowers, it is easy to pop the bloom off the stem, if not you can use your scissors/wire cutter to cut the bloom from the steam.

Step 3: Once all your flowers and greenery is cut, you can start gluing them on to your letter. Using your glue gun place a small drop of glue on your flower and place your flower on your letter, holding it down for a few seconds. I started off with my bigger flowers and then repeated with the smaller flowers, until my entire letter was covered.

Step 4: Once my letter was mostly covered, I went and added greenery in some areas for extra filler.

Step 5: Once complete and everything was dried. I cut some ribbon to my desired length and glued it to the back of my letter. This step is optional since you can hang your letter, or have it propped up and if you do not want to use ribbon you can also use command stirps for picture frames.

Download printable of instructions of this craft:

March 2023 Craft: Mosaic Tiles

By Major Beth Paugh
Intermountain Division

When I think of “Flourishing in the tests and trials season” two things came to mind, the first was a flower breaking through the winter snow. It fights so hard to get through the snow and to show off it beauty. The second thing is how God can take the brokenness that we experience through tests and trials and turn them into something beautiful. So why not combine the two and create something beautiful to remind us that God can create something beautiful through our trials.

Garden Mosaic Tiles are actually very easy and inexpensive to make. And the great thing is that no two are alike, just like us.

Supplies List:

  1. Stones or White Plaster Mix
  2. Shape or mold to hold plaster
  3. Something hard to set the mold on while it hardens
  4. Gloves
  5. Safety Glasses
  6. Hammer
  7. Large Ziplock Bag
  8. Popsicle Sticks
  9. Sponge
  10. Design pattern
  11. Pieces of tiles. Size will depend on the size of the shape or mold you use. You can also go to a Thrift Store and buy dishes to break into pieces. Thus, the need for the Ziplock bag and hammer.

Directions:

STEP 1: Decide what design you want to use with your tiles. It is helpful to draw out your design on a piece of paper. You will use this for two things. The first is to use this pattern to trace onto the plaster. The second it to help you lay out the tiles to figure out any pattern you wish to use. Make sure that your design is not bigger than the mold or shape you will be using.

STEP 2: Mix plaster per directions. It should have a batter type consistency, you don’t want it to be too runny. You will need enough plaster to fill the mold or shape.

STEP 3: Pour plaster into the mold or shape. Tap it gently on a surface. This helps to evenly spread out the plaster. Once it is level, set it aside to allow it time to begin to harden. Place on a hard surface that you
can easily move.

STEP 4: Trace your pattern into the plaster.

STEP 5: If using precut tiles, begin placing them around your paper pattern. This gives you a chance to play around with colors and shapes of tiles.
If using dishes from a Thrift Store, place them into the Ziplock bag and break into pieces with the hammer. Then when you have the desired sizes, begin placing them onto the paper pattern.

STEP 6: Continue arranging the pieces onto the paper pattern until you have a design you are happy with.

STEP 7: Begin transferring the tiles one at a time from the paper into the plaster. You can either use your finger to press them into the plaster or the popsicle stick. Continue until you have transferred all the tiles into the plaster.

STEP 8: Tap gently on a surface once again to make sure all the tiles are securely into the plaster. The plaster should come right up to the top edge of the tile to make sure they don’t fall out.

STEP 9: Set aside for approximately 24 hours to allow time to fully harden.

STEP 10: Using the sponge and warm water, wash off the tops of the tiles to remove any unwanted plaster.

Step 11: Remove from the shape or mold and enjoy!

Download printable instructions of this craft:

February 2023 Craft: Easy Macrame Rainbow

By Major Nancy Ball
Divisional Secretary for Program – Hawaiian & Pacific Islands Division

Tools & Supplies:

  • Hot glue gun
  • Scissors
  • Wire cutters
  • cotton rope – inside (smallest) row cut 12 strands to 14″
  • Yarn in various colors (medium weight)
  • Glue sticks
  • Floral wire – 22 gauge (doubled for each color of the rainbow – smallest one 11″)
  • Painters tape

Directions:

  • Lay doubled wire onto 12 strands of cotton string. Secure ends with painter’s tape. (See picture below)
  • Begin wrapping desired color of yarn around the string and wire until the desired length is covered with yarn. (See picture below)
  • Cut off exposed ends of wire. Glue all 4 rows together in the shape of a rainbow. Trim ends of cotton string about 2 inches below rainbow. Brush out the strands of string. Hot glue a length of string to the back as a hanger.

Download printable craft directions:

January 2023 Craft: Finding Your Peace Painting

By Captain Jan Pemberton
Divisional Women’s Ministries Secretary – Cascade Division

When we are looking for peace or a break from the ordinary in our lives, we often gravitate to a hobby that gives us peace and lets us disconnect from the stresses of the world in which we live in. Some of us love the great outdoors, enjoying activities such as hiking, biking, and fishing, and some of us enjoy the outdoors in other ways, such as watching nature from the comfort of our homes or campsites. However, not everyone is cut out for the great outdoors, some due to mobility, health, and such. When those of us who are not outdoorsy look for something to give us peace, we turn to other activities such as playing an instrument, coin and stamp collecting, sewing, embordering, and painting.

Today we are going to explore the world of painting. Remember, we don’t have to be Rembrandt, Van Gogh, or any other famous painter to enjoy our hobby. All we need are some simple tools, inspiration, and time.

Below are instructions to paint a simple background with your favorite memory verse or inspirational quote.

Supplies needed:

  • Acrylic Paint
  • Paint brushes
  • Primed Canvas
  • Pencils
  • Paint Markers, if desired
  • Ruler or stencil
  • Paint remover for brushes
  • Table covering

Instructions:

  1. Paint the entire canvas with desired background color

2. Draw the intended image for the background and paint the image with desired colors.

3. Add your favorite scripture verse or inspirational quote.

4. Have fun with this craft. Make it your own and put your personal spin on this project. Remember, no matter your interests, allow God to use them for His glory and use the talents He has given you.

Download printable craft directions