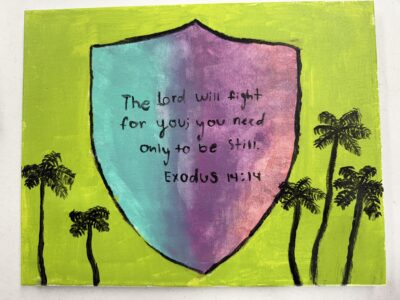

November 2025 Craft
Stepping out in Faith Stones by Captain Mysti Birks
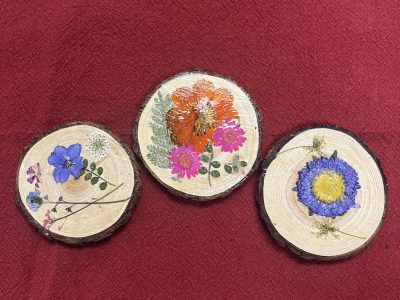
October 2025 Craft: Pressed Flower Coaster
Each flower tells a story of God's creativity...
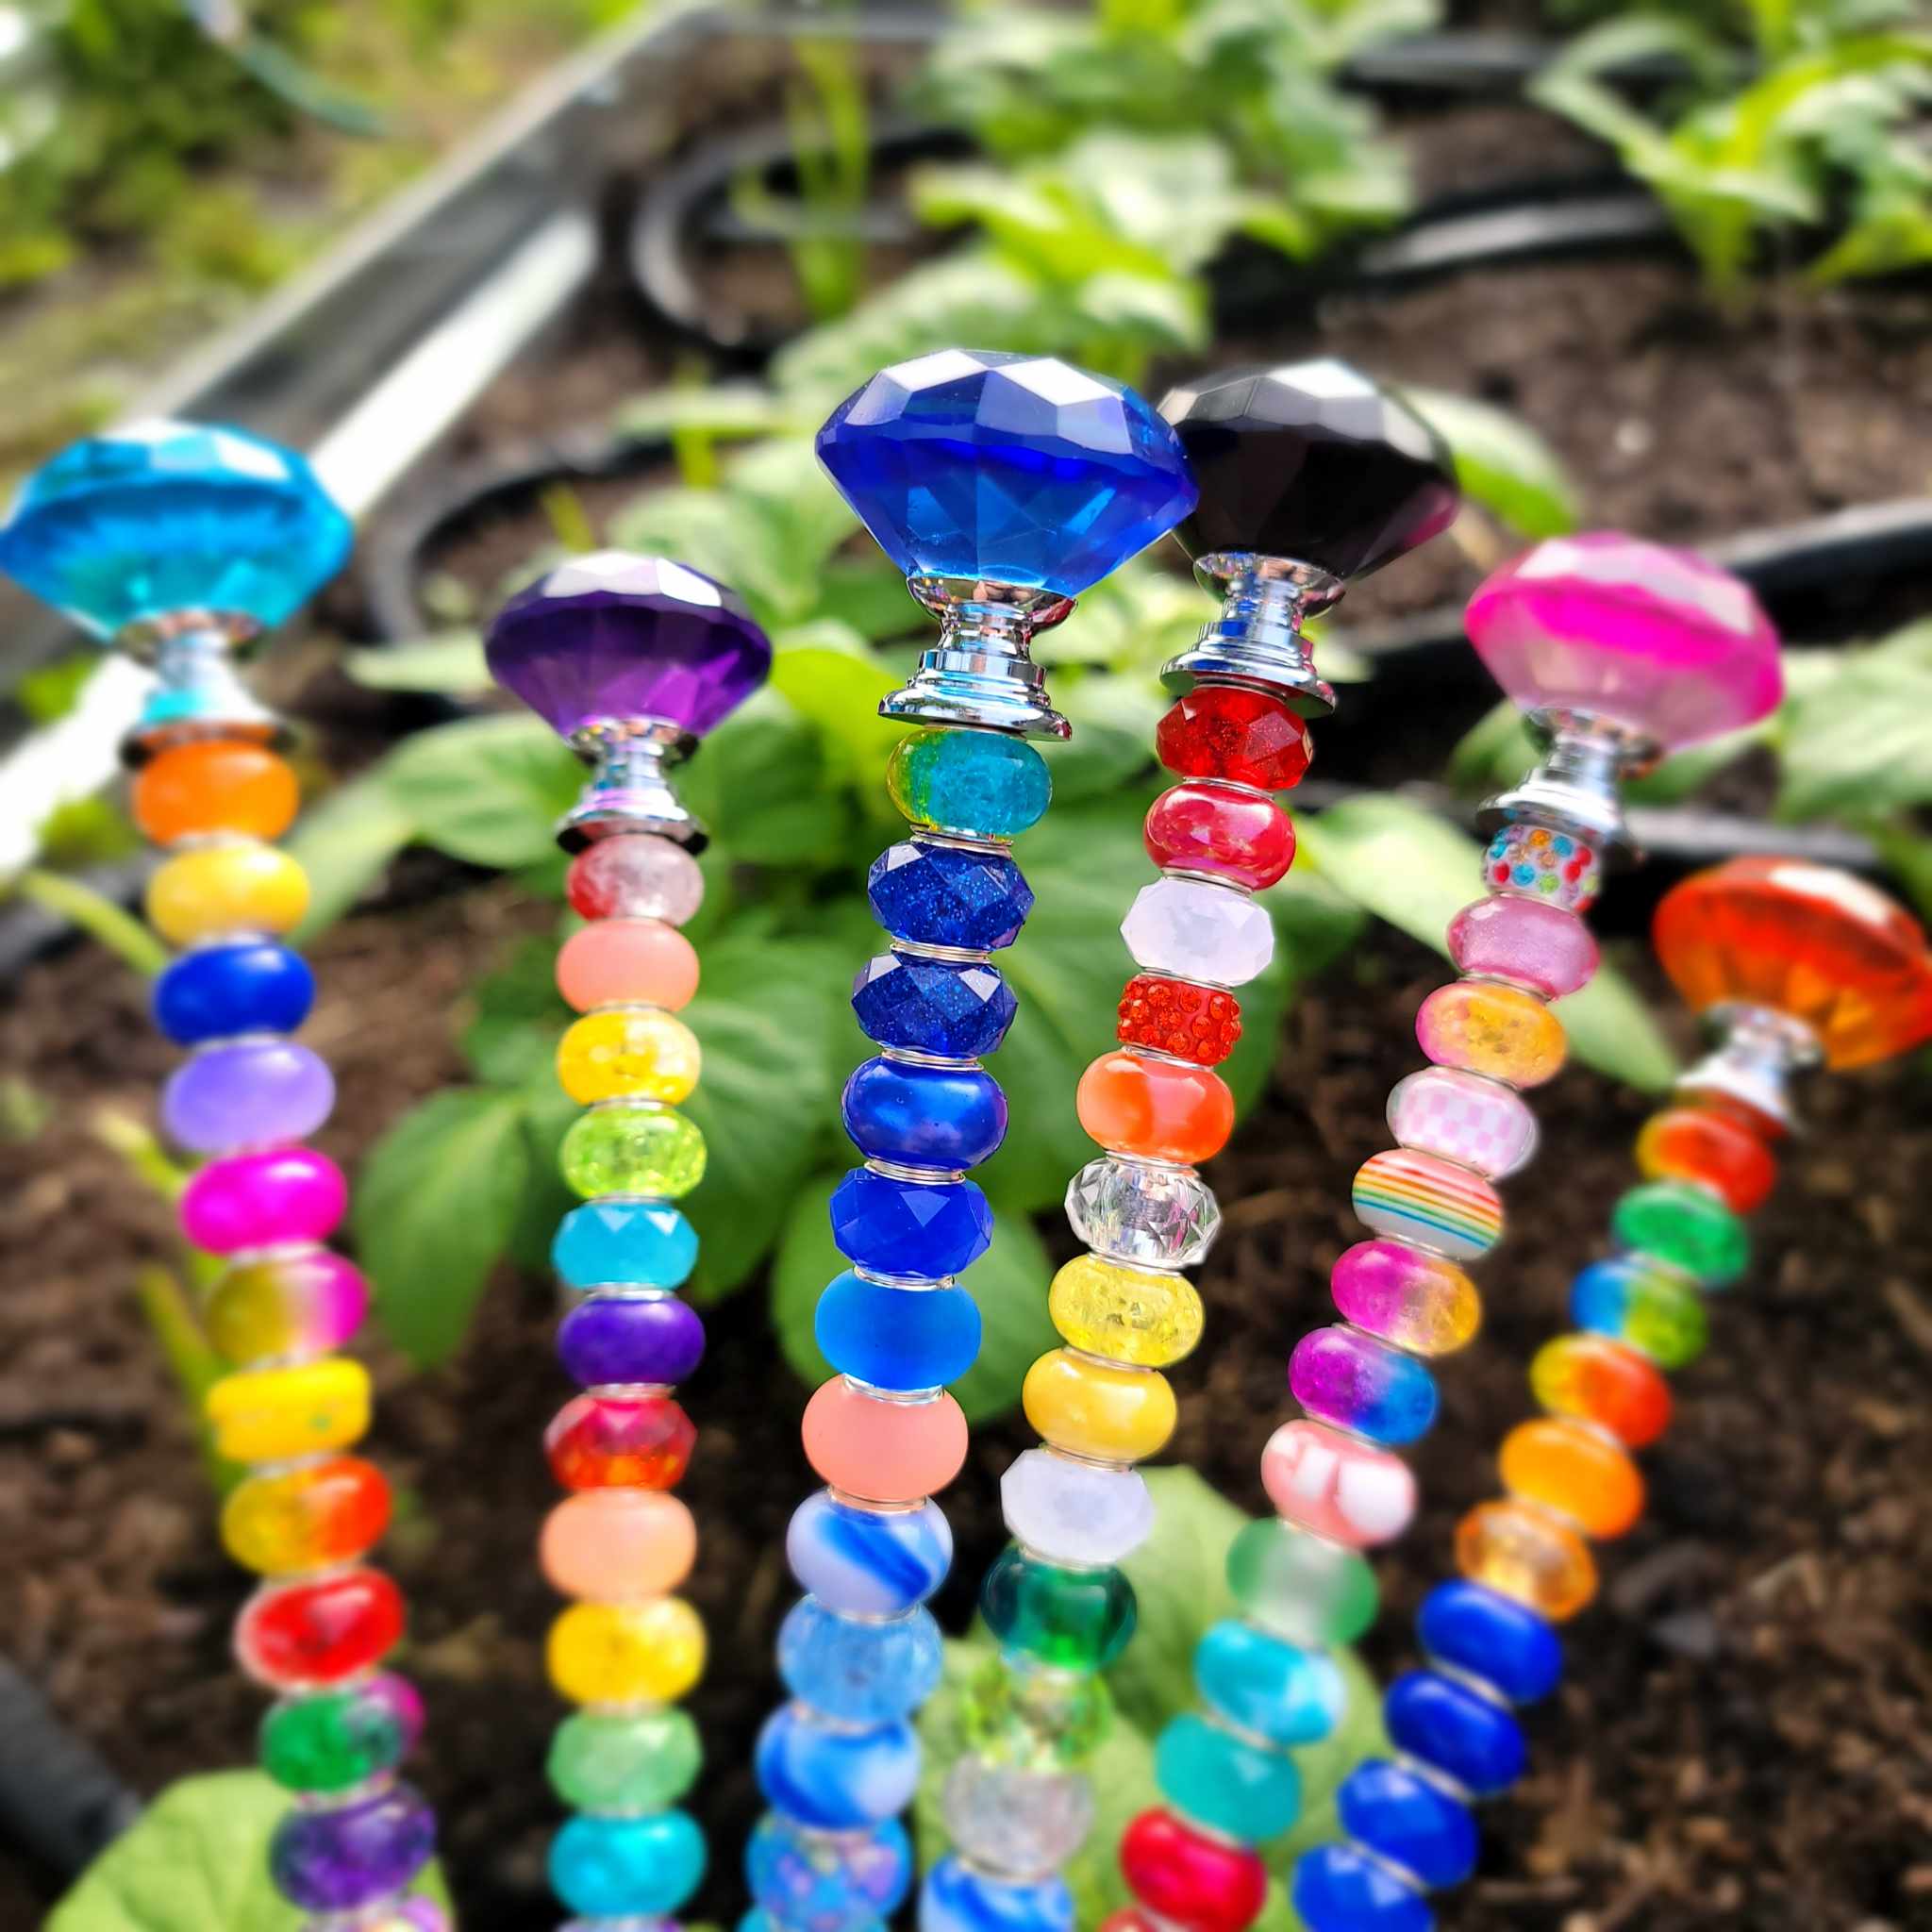
September 2025 Craft: Beaded Victory Garden Wands
By Captain Gin PackCentralia, WA Corps – Northwest Division Although the primary focus of Victory Gardens was to produce food. They were also a place to showcase deep pride for …
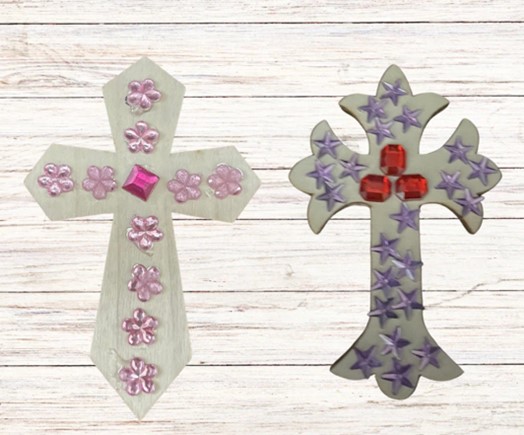
August 2025 Craft: Mosaic Cross
By Captain Jan PembertonDivisional Women’s Ministries Secretary – Cascade Division Materials Needed: Instructions: Step 1: Use either your Cricut, Exacto knife or sheers to cut out a predetermined pattern. This …
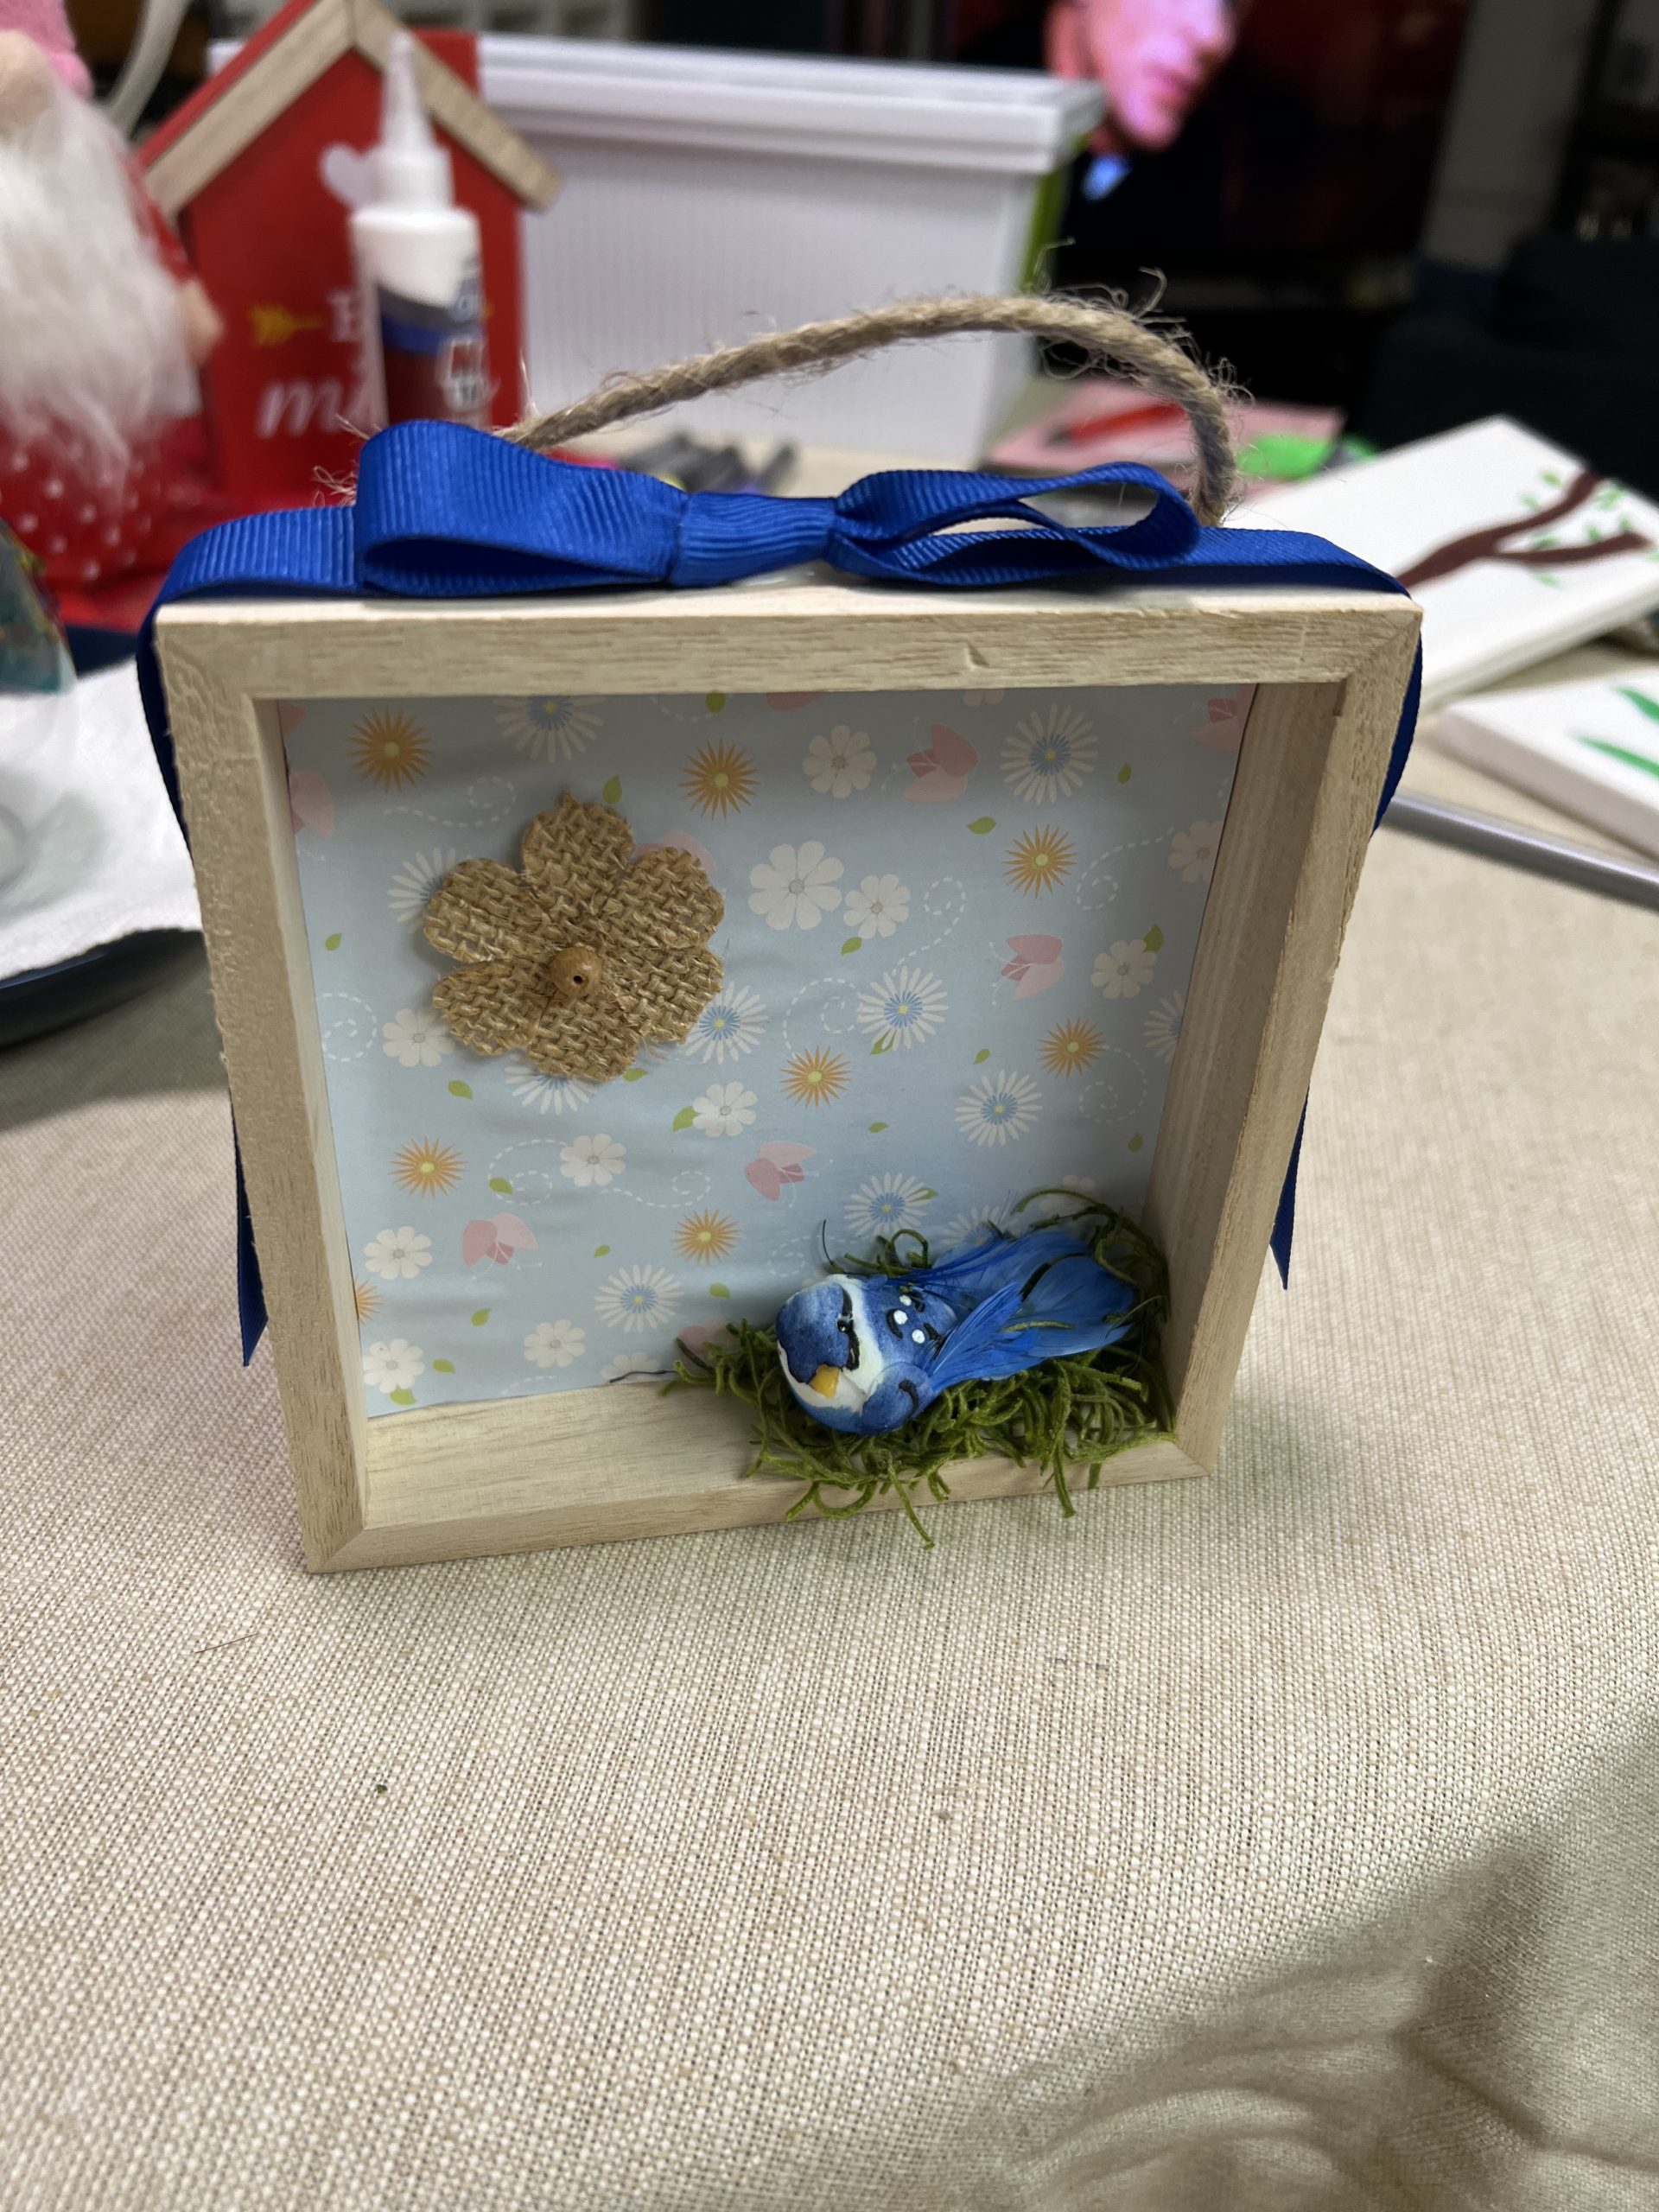
July 2025 Craft: Bird Plaque
By Major Harryette RaihlDivisional Women’s Ministries Secretary – Southern California Division Items Needed: Instructions: Cut to size and paste designed paper onto wooden inside frame (see in photo). Add flowers, …
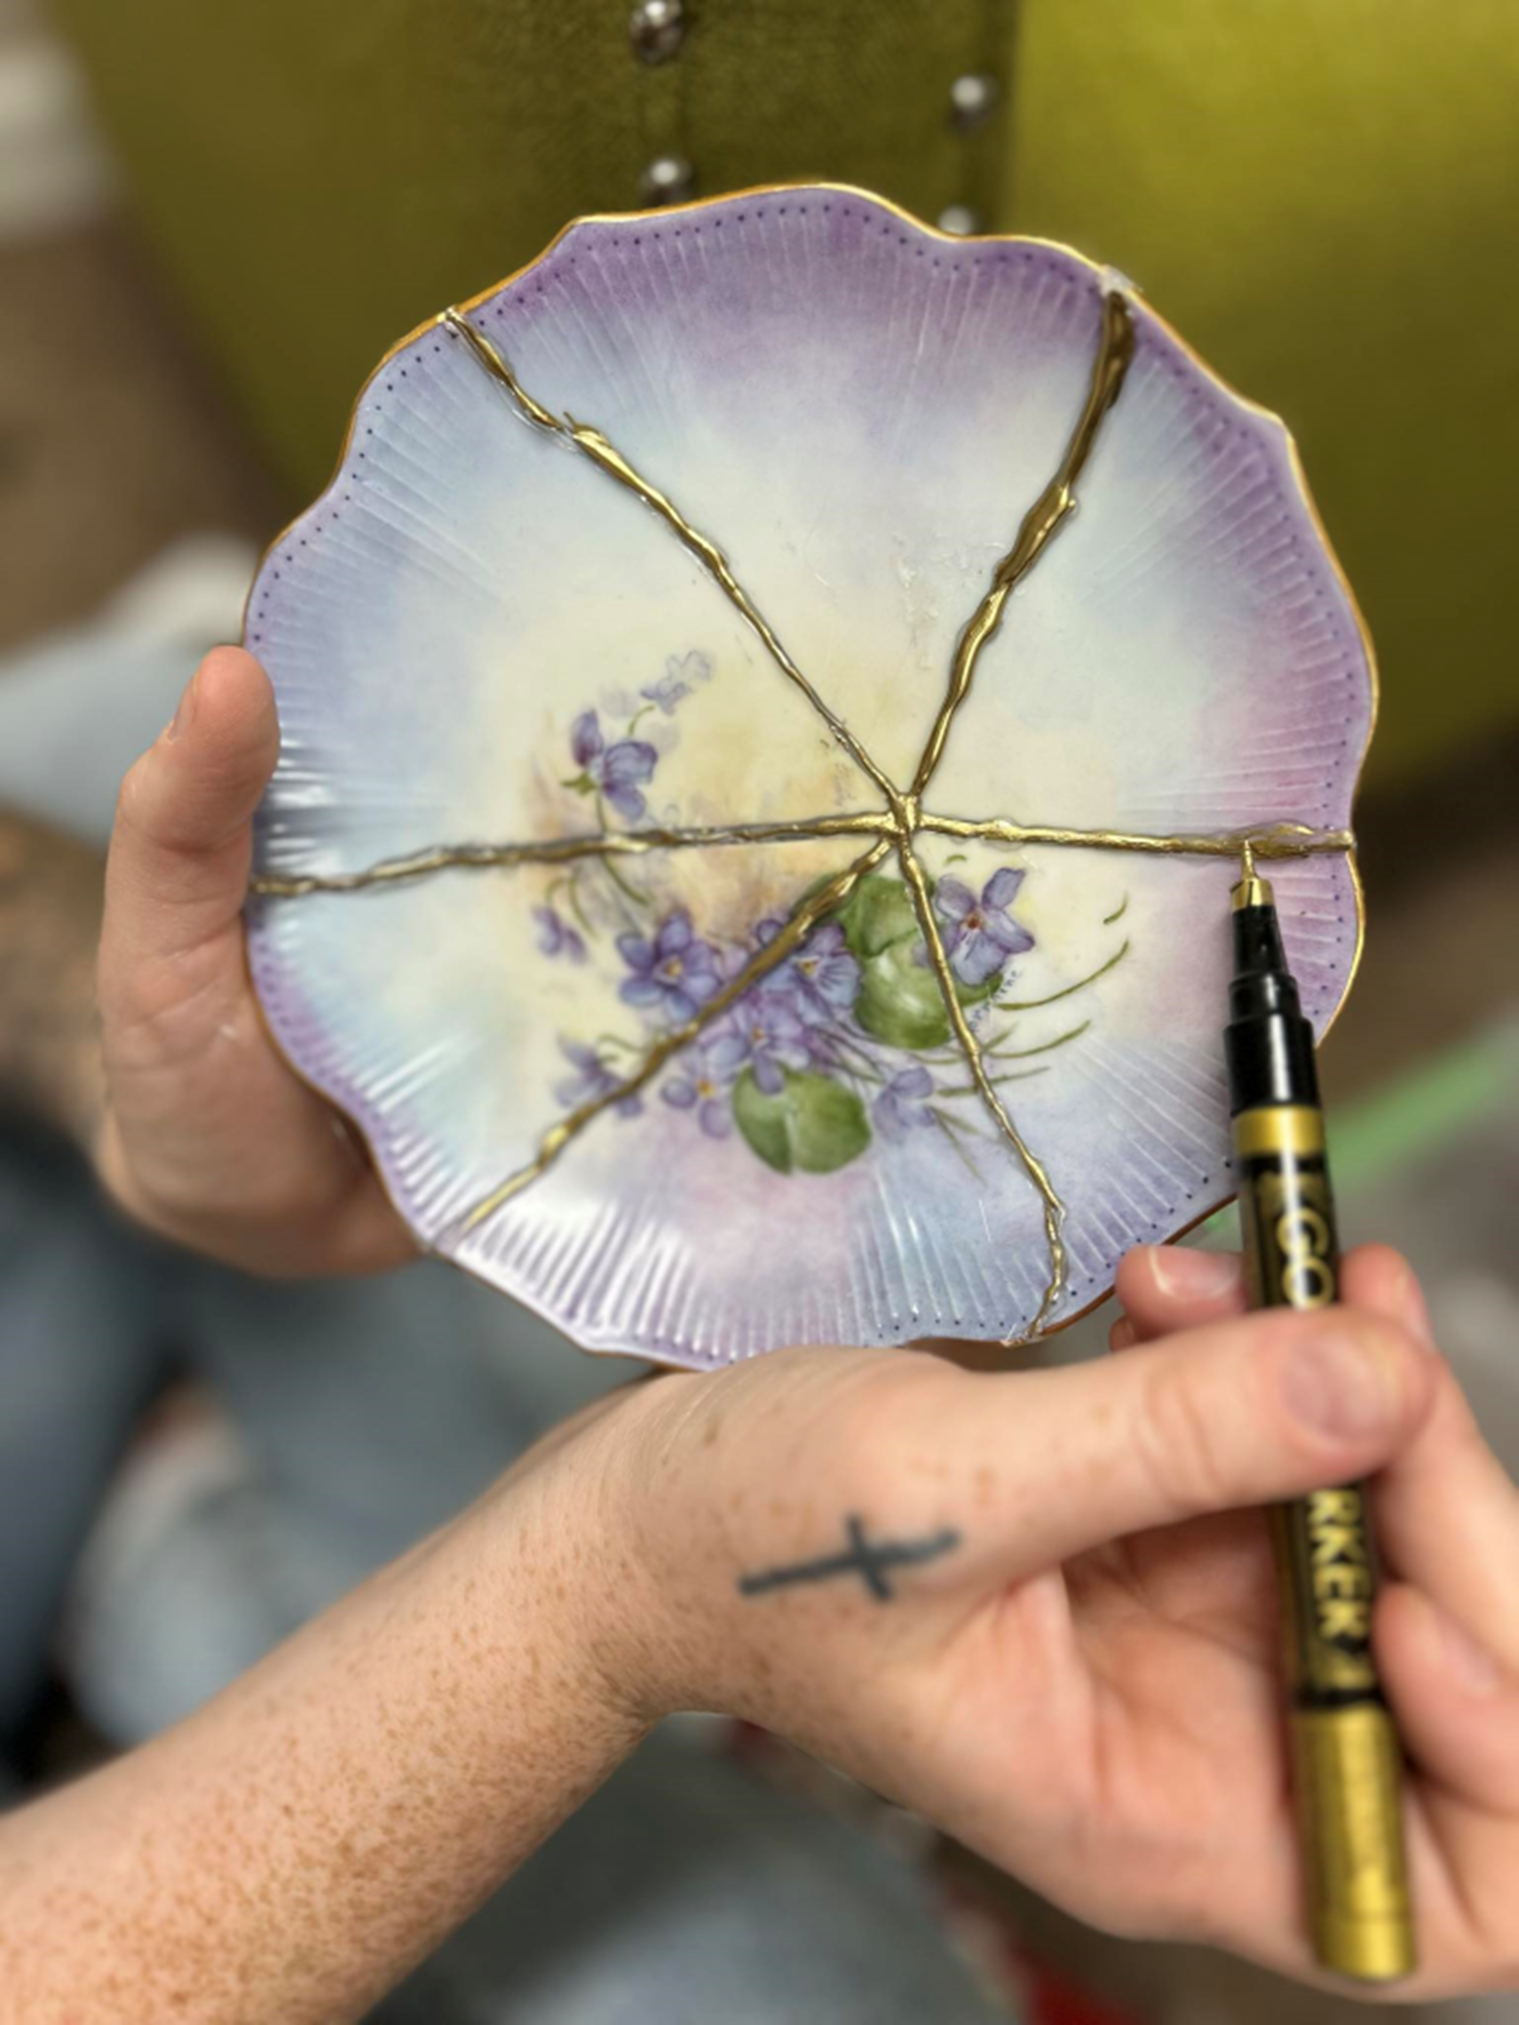
June 2025 Craft: Kintsugi
By Major Tammy Ray, Sara Ray and Carol WorldRedding, CA Corps – Del Oro Division Kintsugi is an artistic technique of repairing broken pottery in a way that enhances imperfections …
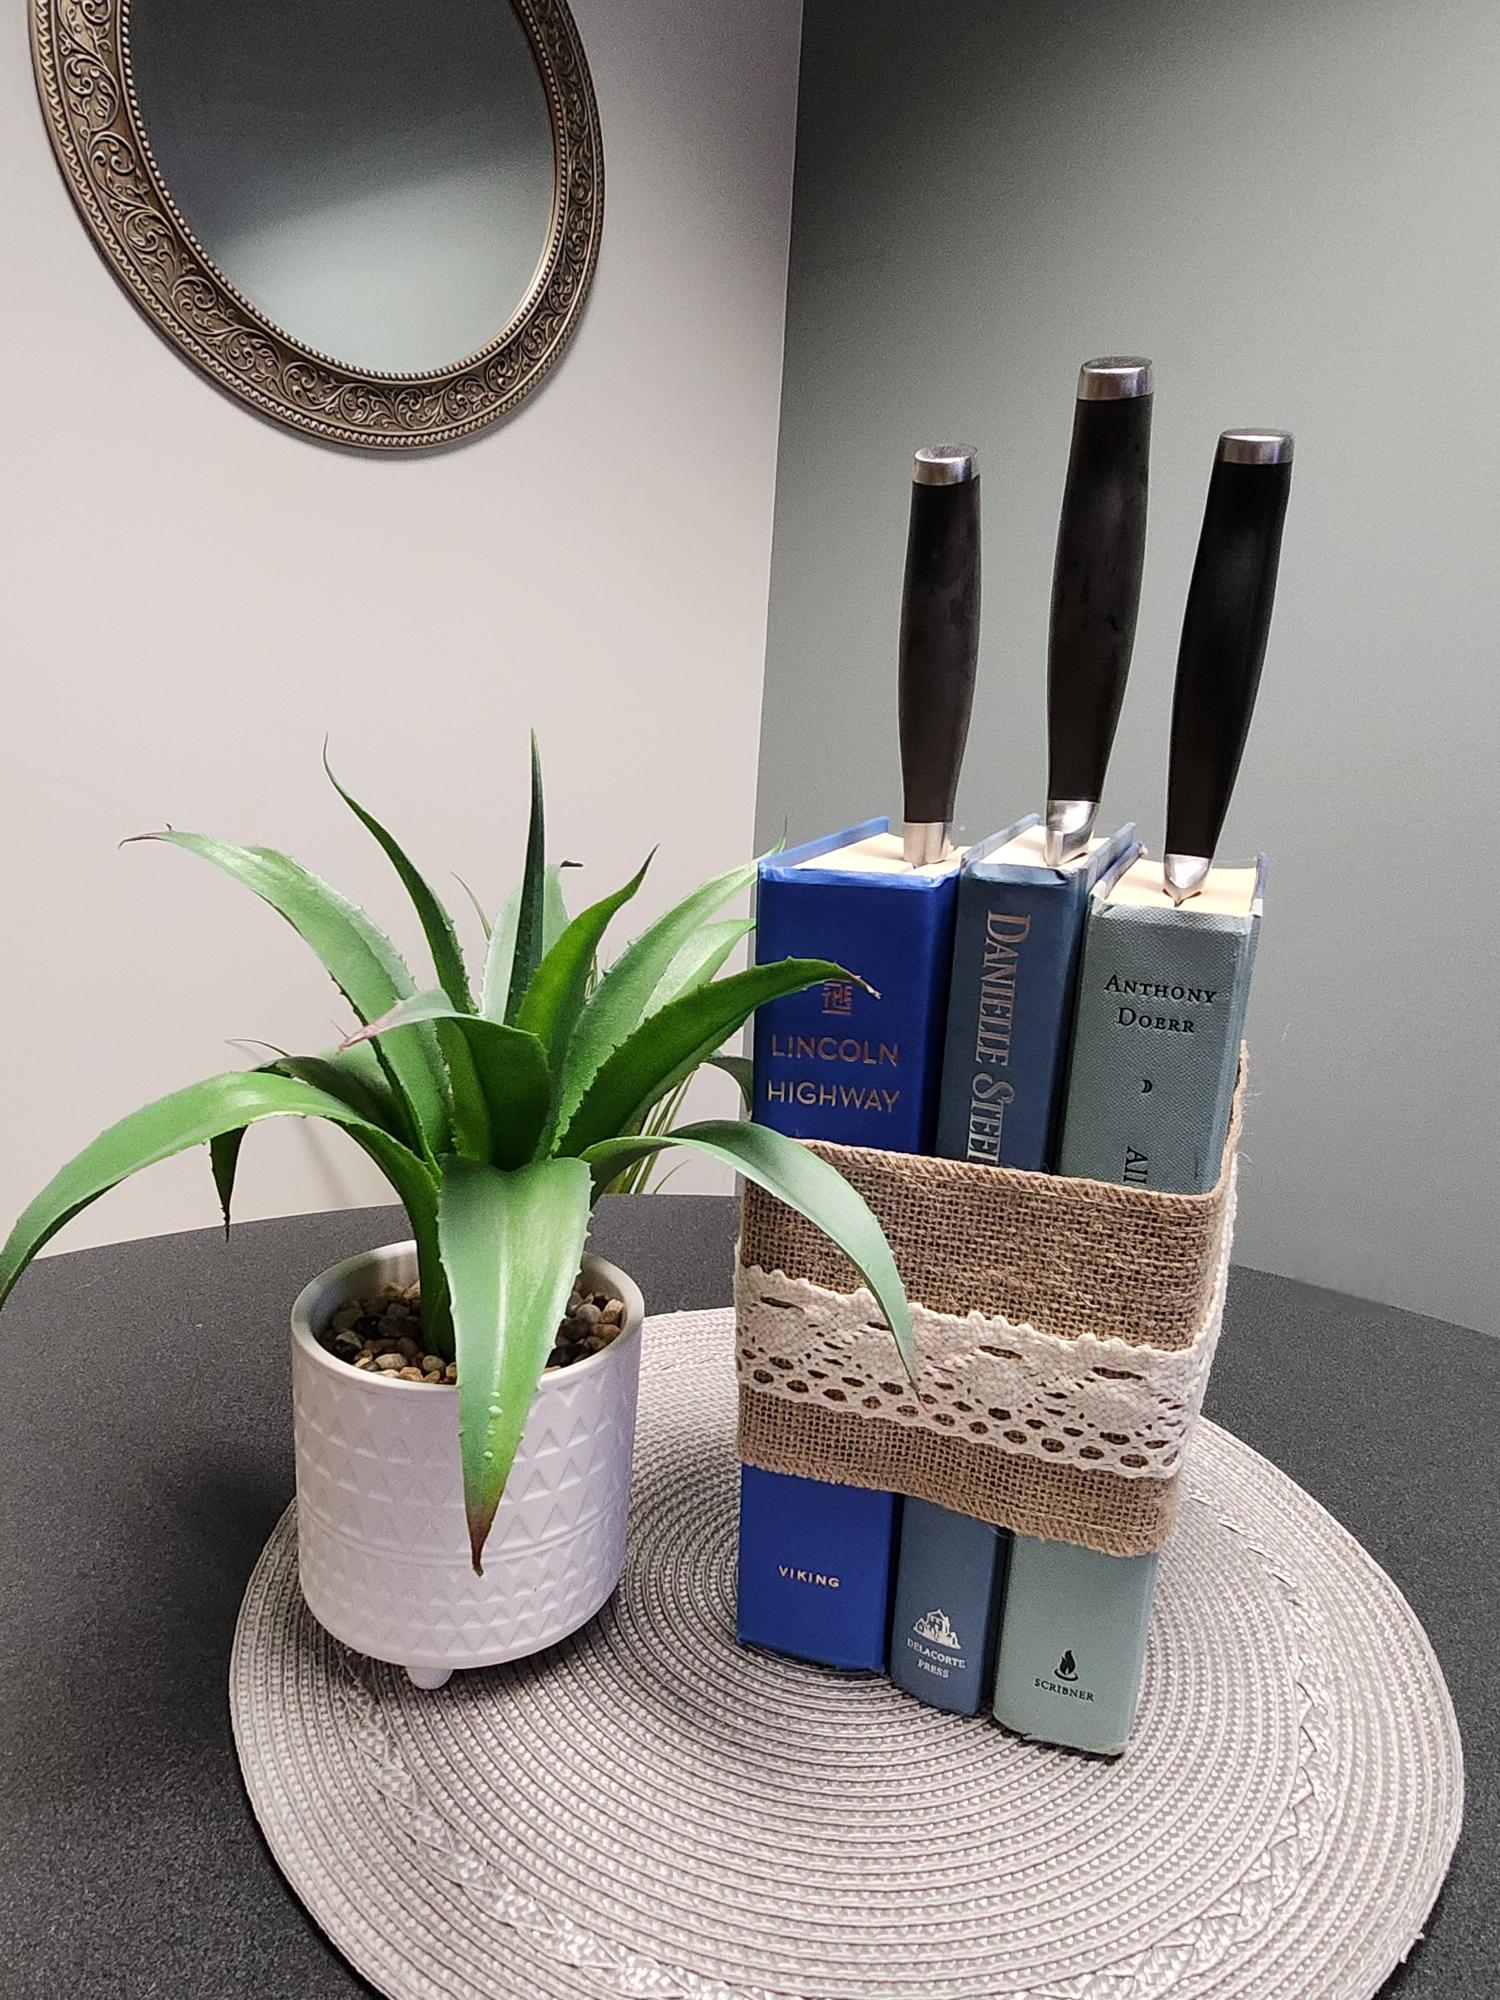
May 2025 Craft: Book Knife Block
By Lt. Colonel Noelle NelsonDirector of Special ServicesAdult Rehabilitation Centers Command Instead of throwing out your old hardback books, rescue them from the trash heap and make a knife block! …
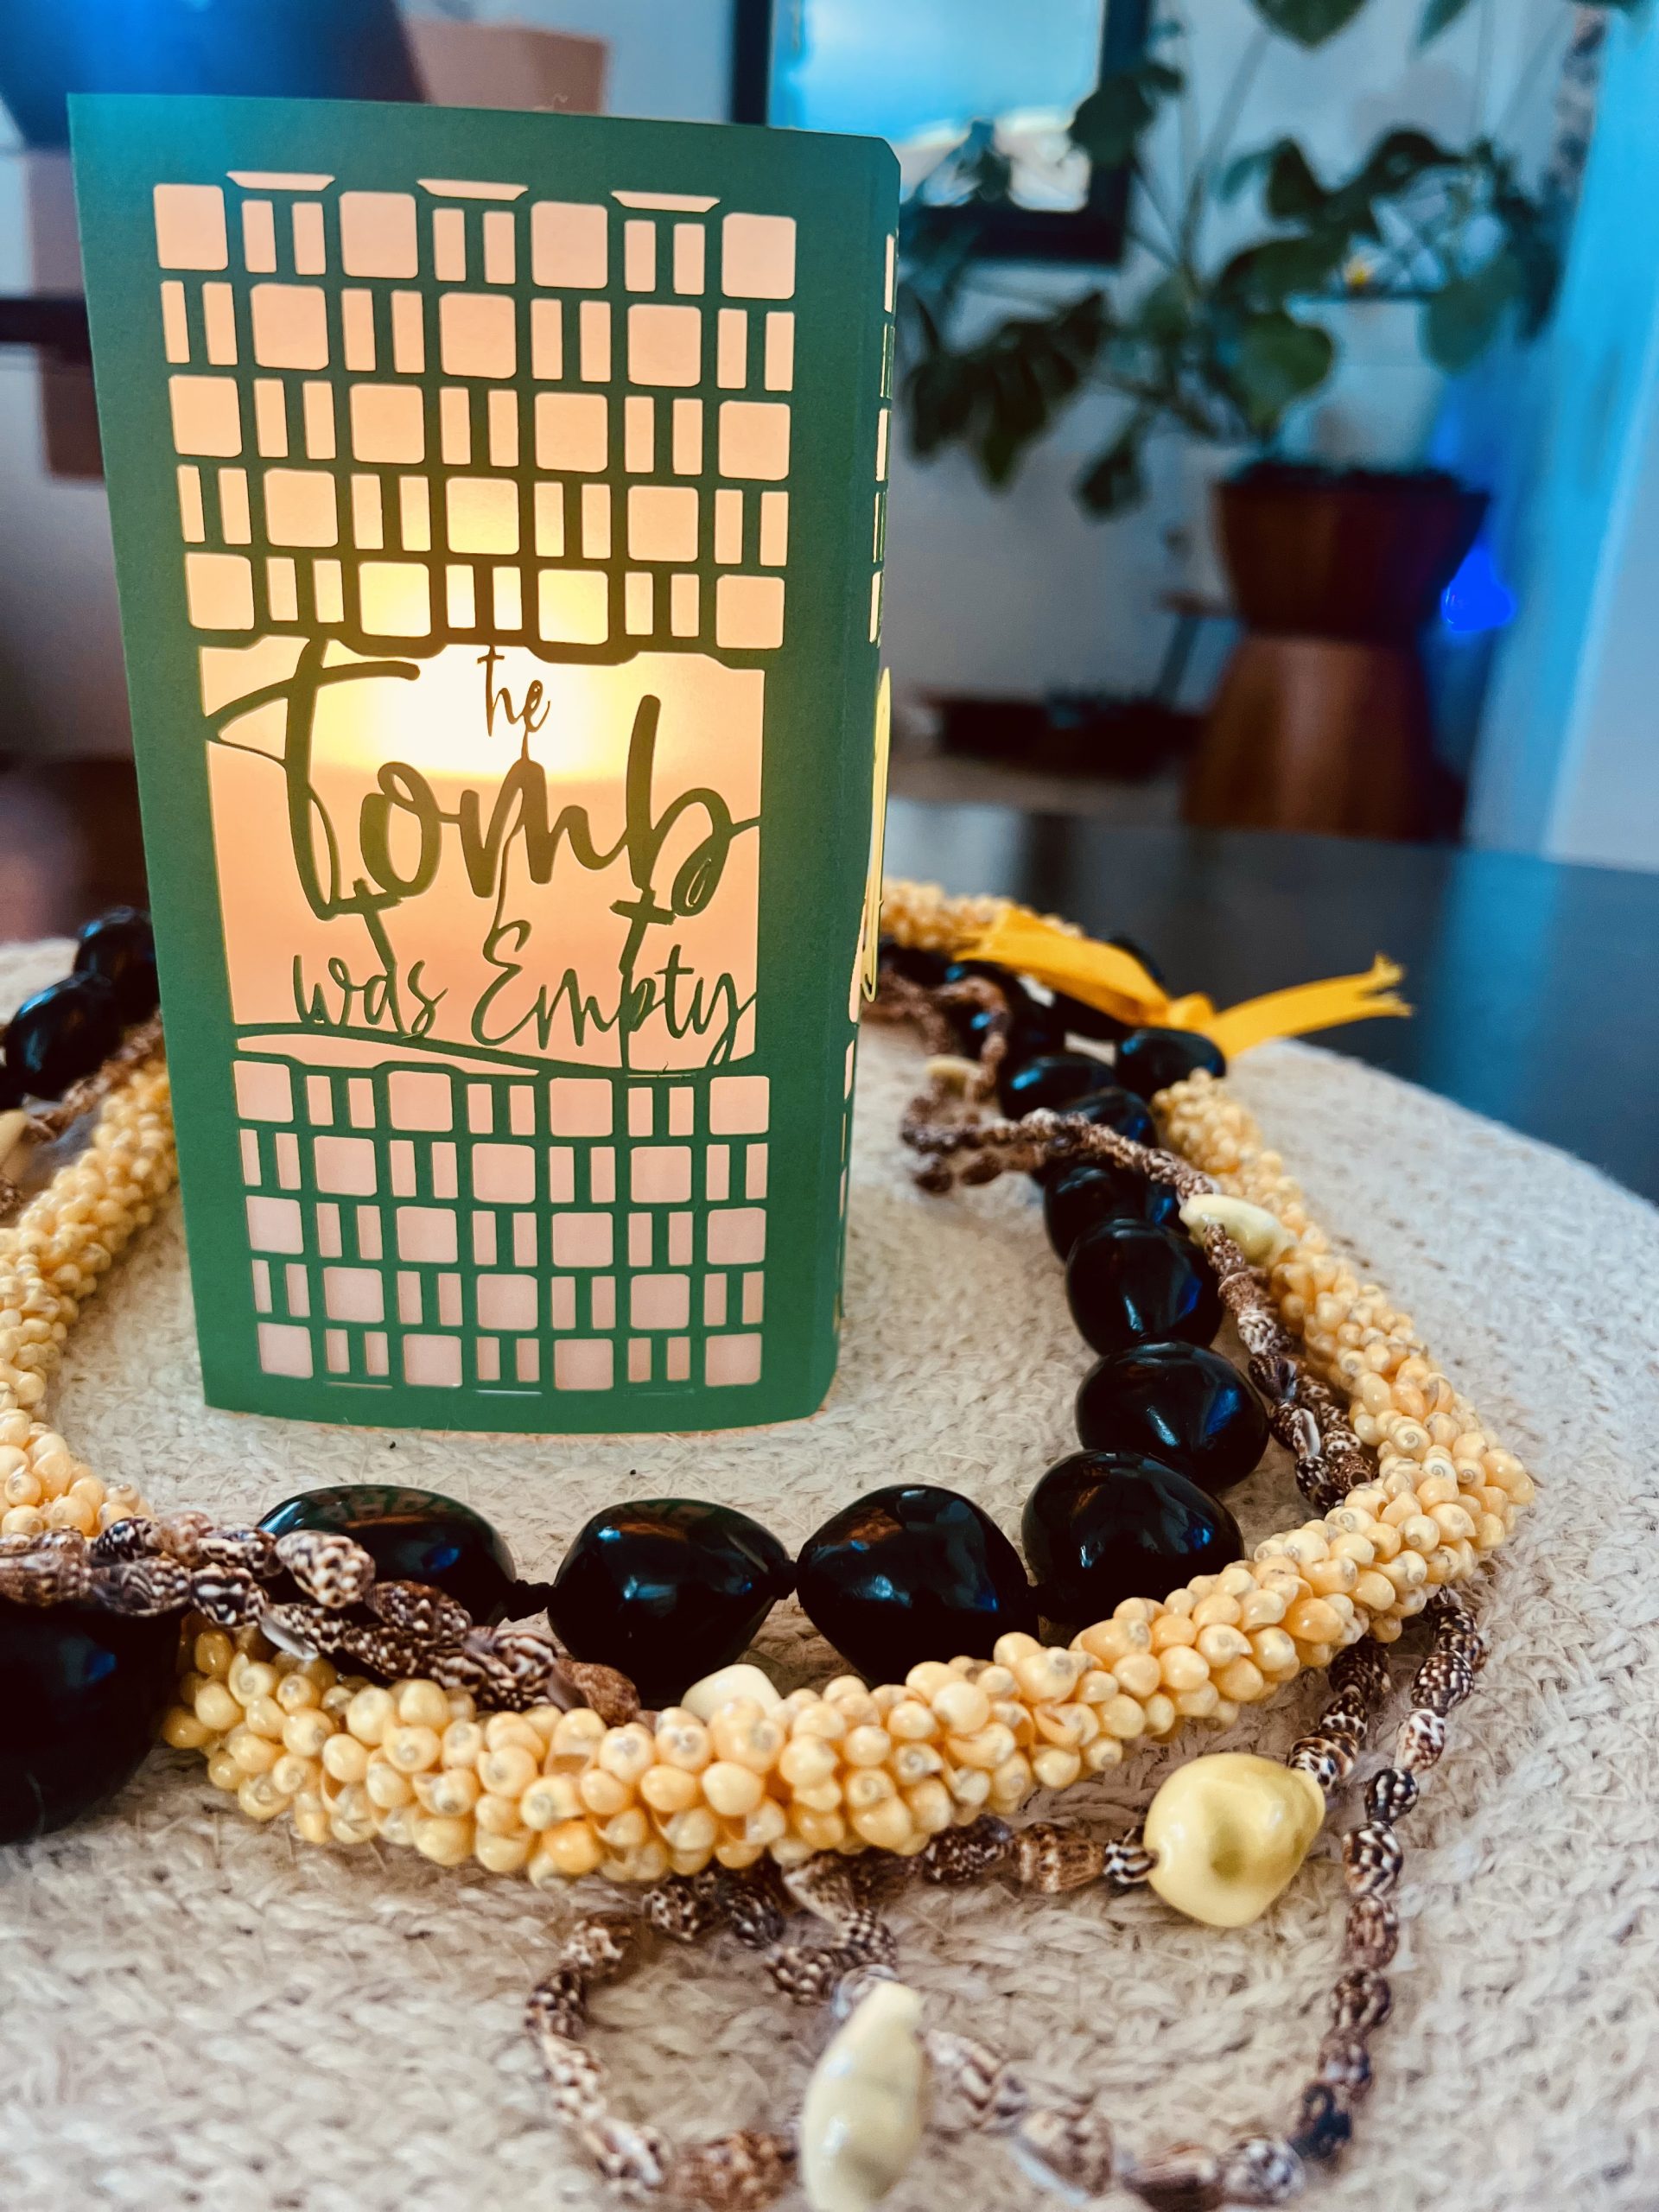
April 2025 Craft: Resurrection Easter Craft
By Major Lynn StewartKapolei Kroc, HI – Hawaiian and Pacific Islands Division This Easter craft is not only a beautiful centerpiece, but it’s also a perfect visual for devotional purposes. …
March 2025 Craft: Creating a Masterpiece
By Captain Aimee DochertyIntermountain Division For we are God’s masterpiece. He has created us anew in Christ Jesus, so we can do the good things he planned for us long …

February 2025 Craft: You Are Loved Heart
By Captain Serina WoodsHaines, AK Corps – Alaska Division Supplies Needed: Directions: Before craft preparation Step 1: Print out hearts – one large and one small for each person (Pattern …

January 2025 Craft: Created In His Image Mirror
By Major Peggy Helms, Riverside, CA Corps& Major Angela Strickland, Divisional Women’s Ministries Secretary – Golden State Division For you created my inmost being; you knit me together in my mother’s …

December 2024 Craft: Lighted Garland
By Major Jessyca CarrEducation OfficerCollege for Officer Training There are so many different combinations of fabric or ribbon and lights; you can check out YouTube for other options. Using fabric …
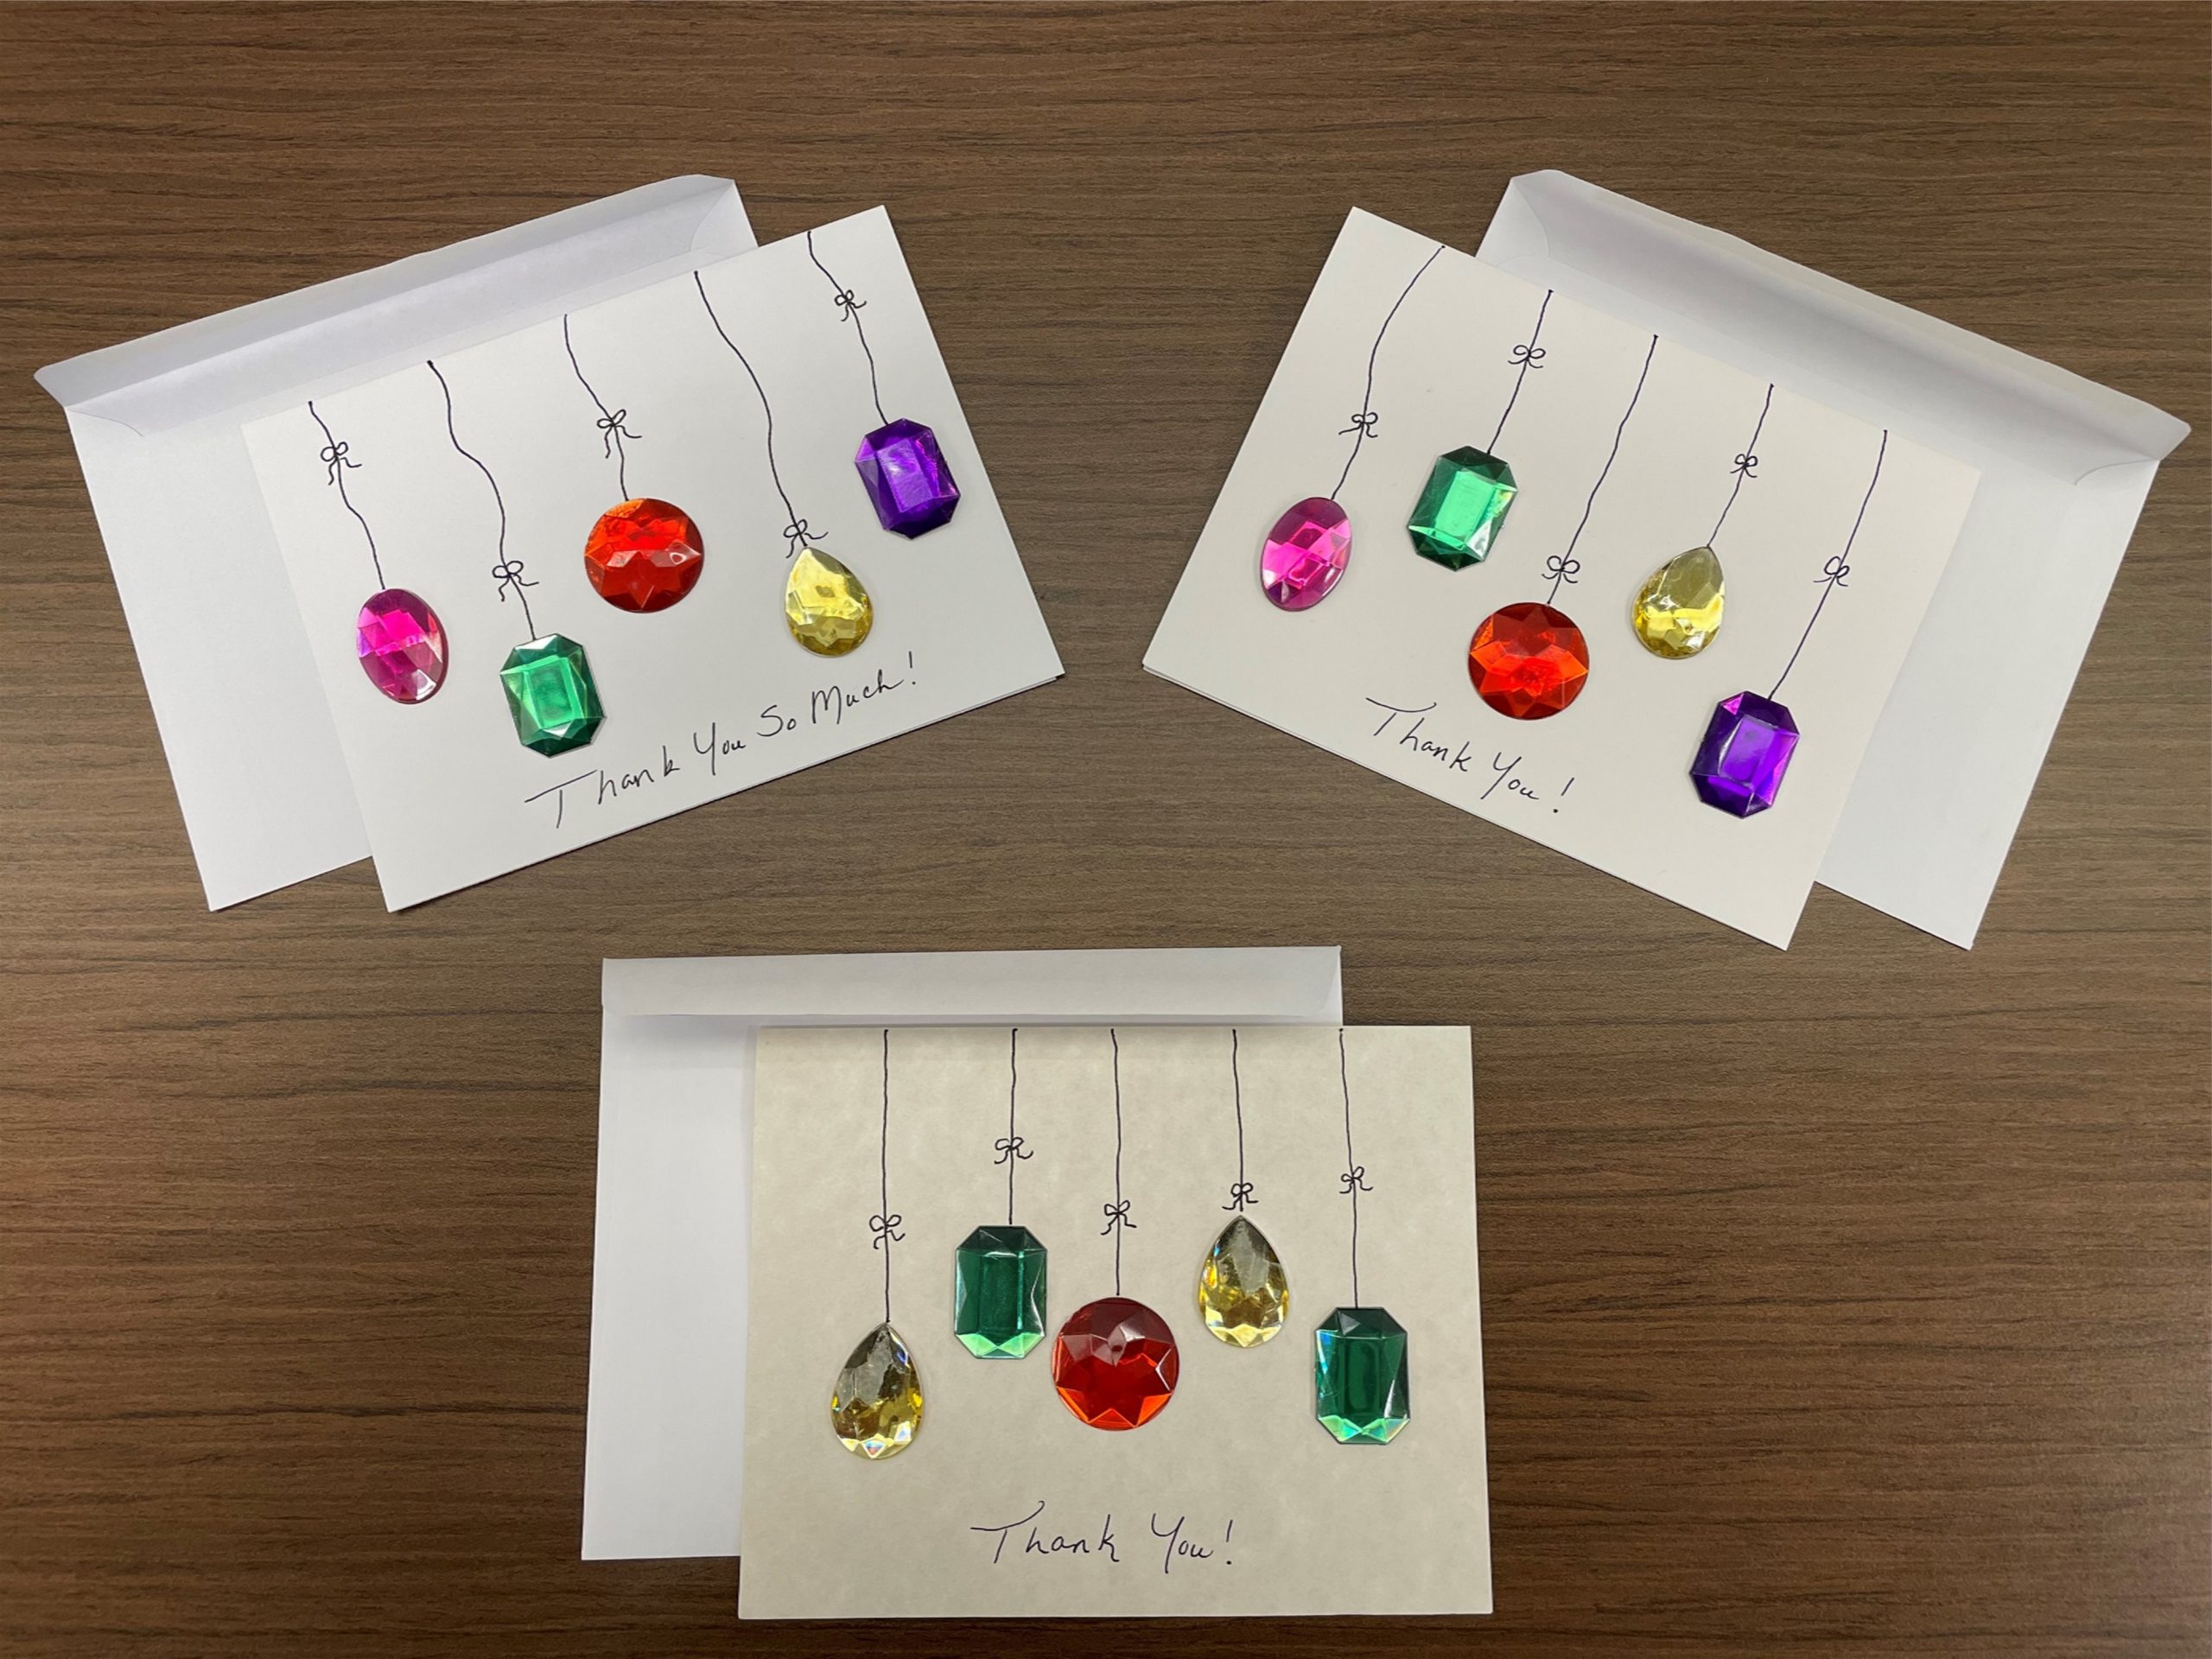
December 2024 Bonus Craft: Thank You Cards
By Margaret GriecoTerritorial Women’s Ministries Department Philemon 1:4-5 – “I always thank my God as I remember you in my prayers, because I hear about your love for all his …
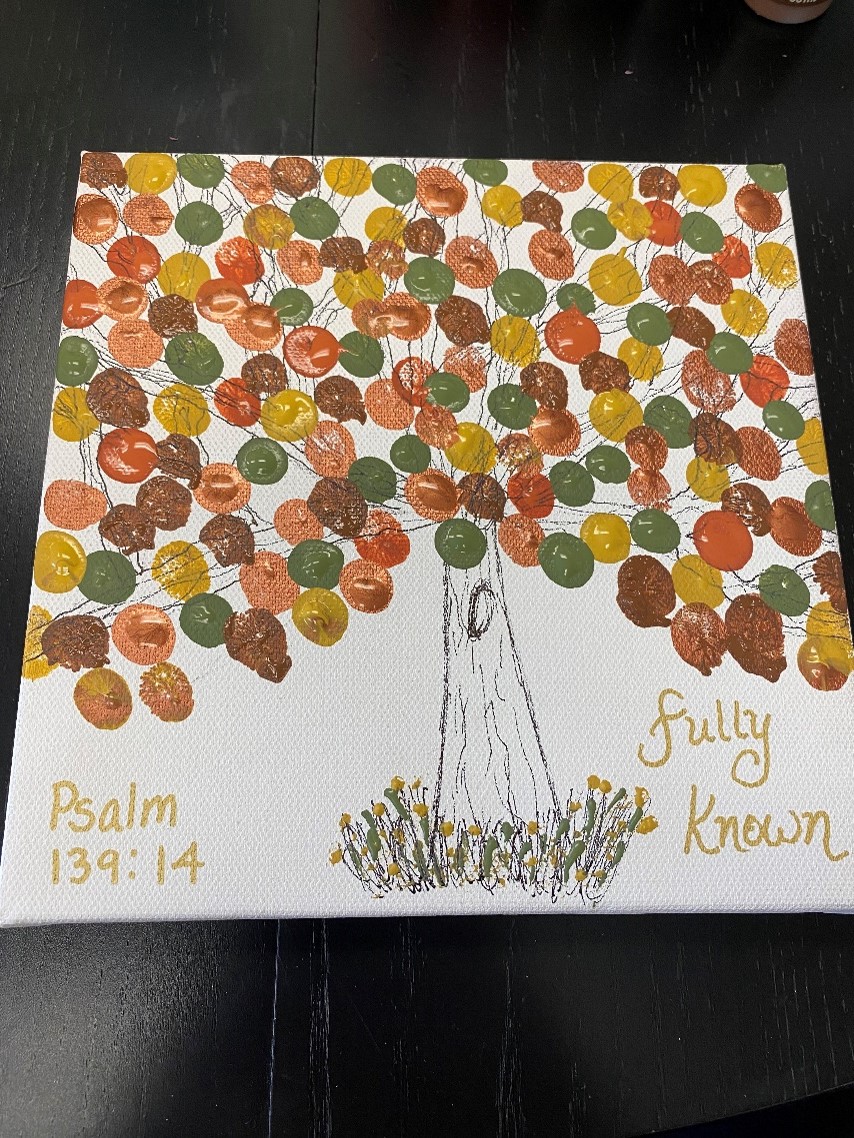
November 2024 Craft: Fingerprint Tree
By Major Gaylene YardleyDivisional Women’s Ministries Secretary – Southwest Division This craft is a tree with all the lady’s fingerprints as leaves in fall colors. You can make one print …
October 2024 Craft: His Precious Child Painting
By Captain Leilani ArmendarizHemet, CA Corps – Southern California Division This craft coordinates with this month’s devotional: His Precious Child. Directions: While you are crafting, enjoy these songs, reminding you …
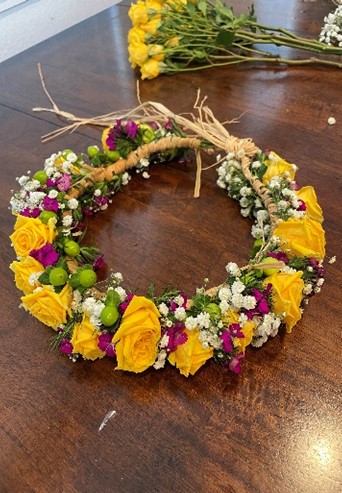
September 2024 Craft: Haku Lei Making
By Lt. Helen ReyesWomen’s Ministries Executive Assistant – Del Oro Division Haku Lei Making – A Hawaiian Crown of Flowers A haku lei, or lei po’o is a lei made …
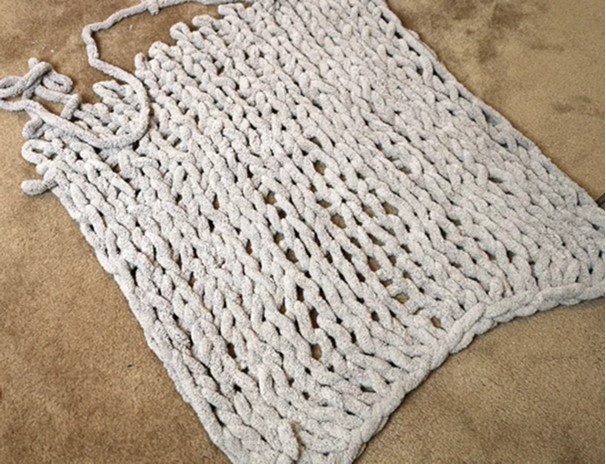
August 2024 Craft: Prayer Hand Knit Blanket
By Captain Jan PembertonDivisional Women’s Ministries Secretary – Cascade Division This is a perfect craft for those like me who have trouble with traditional crocheting or knitting. This project is …
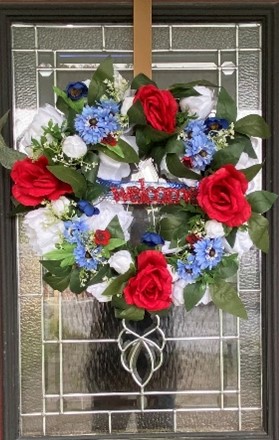
July 2024 Craft: Wreath of Hospitality
By Major Tina BottjenMat-Su Valley, AK Corps – Alaska Division “Welcome one another, therefore, just as Christ has welcomed you, for the glory of God.” Romans 15:7 (NRSV) Materials needed. …

June 2024 Craft: Soap Carving
By Major Gaylene YardleyDivisional Women’s Ministries Secretary – Southwest Division Note: This craft coordinates with this month’s devotional and Bible Study. Supplies Needed: Everyone will carve a cross, heart, Bible …
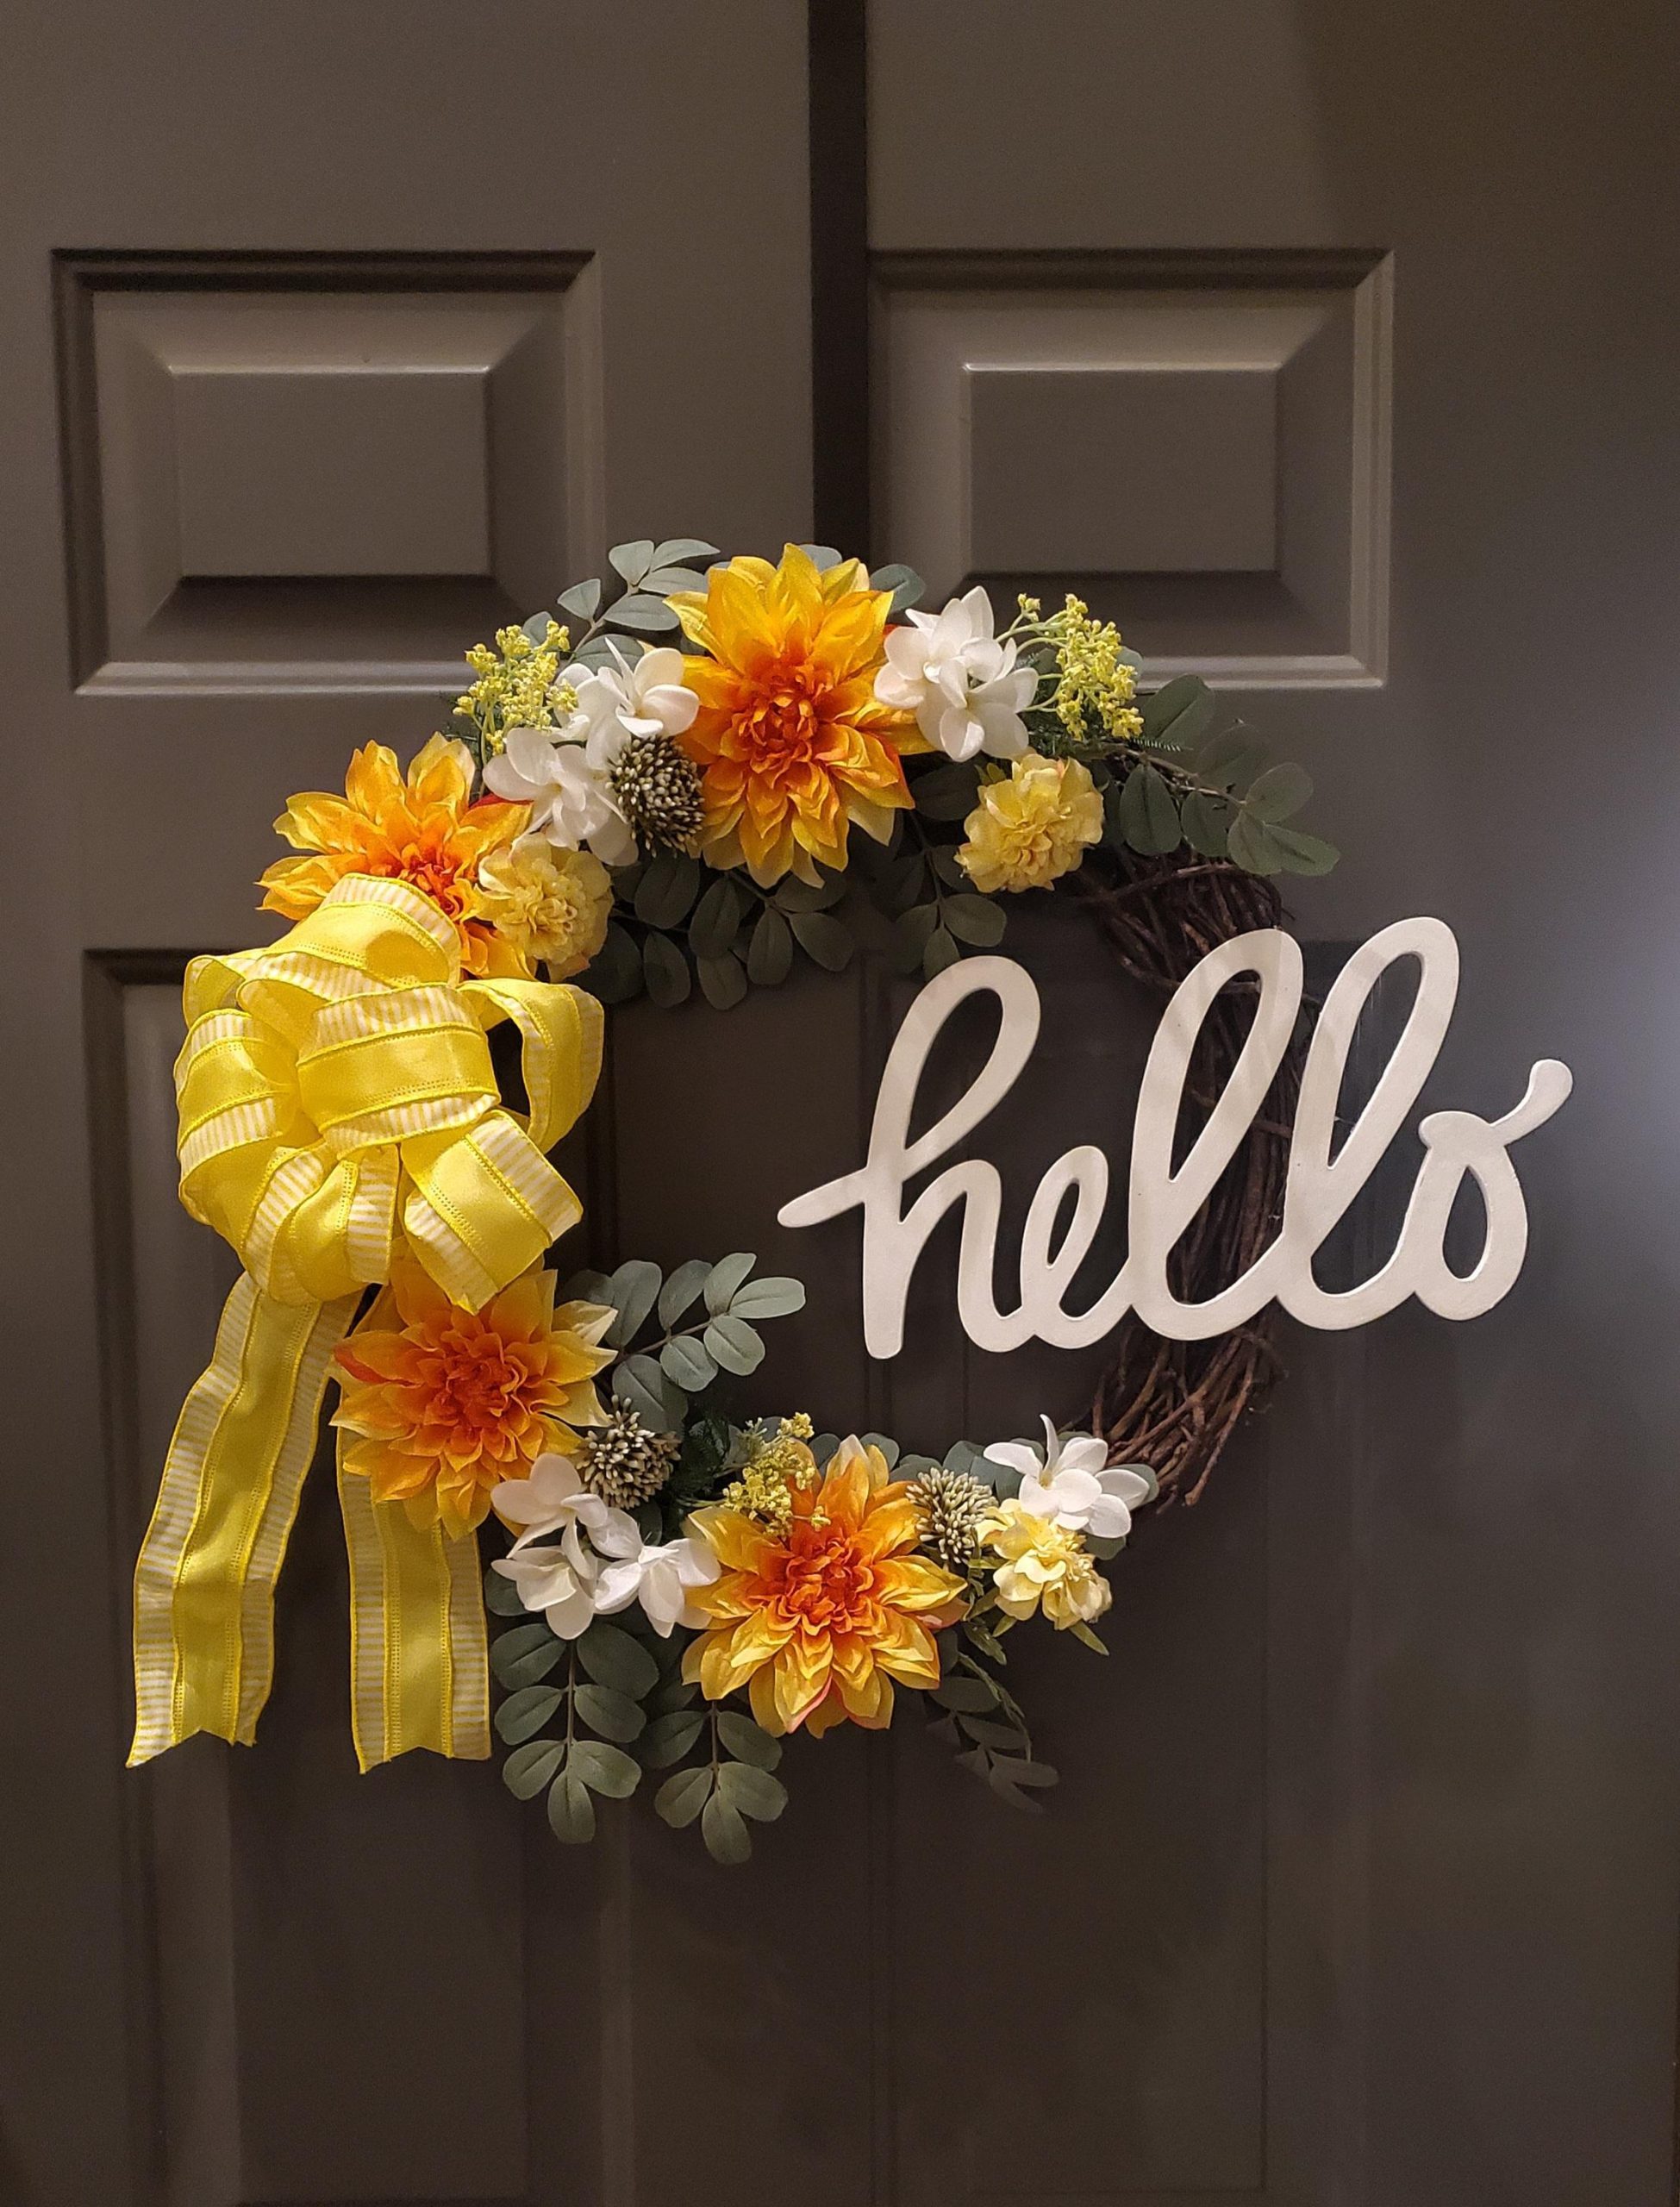
May 2024 Craft: Door Hanging Wreath
By Lt. Katherine HernandezSalinas, CA Corps – Golden State Division As we discover the power our tongues have and identify ways in which we can better control it, let us …
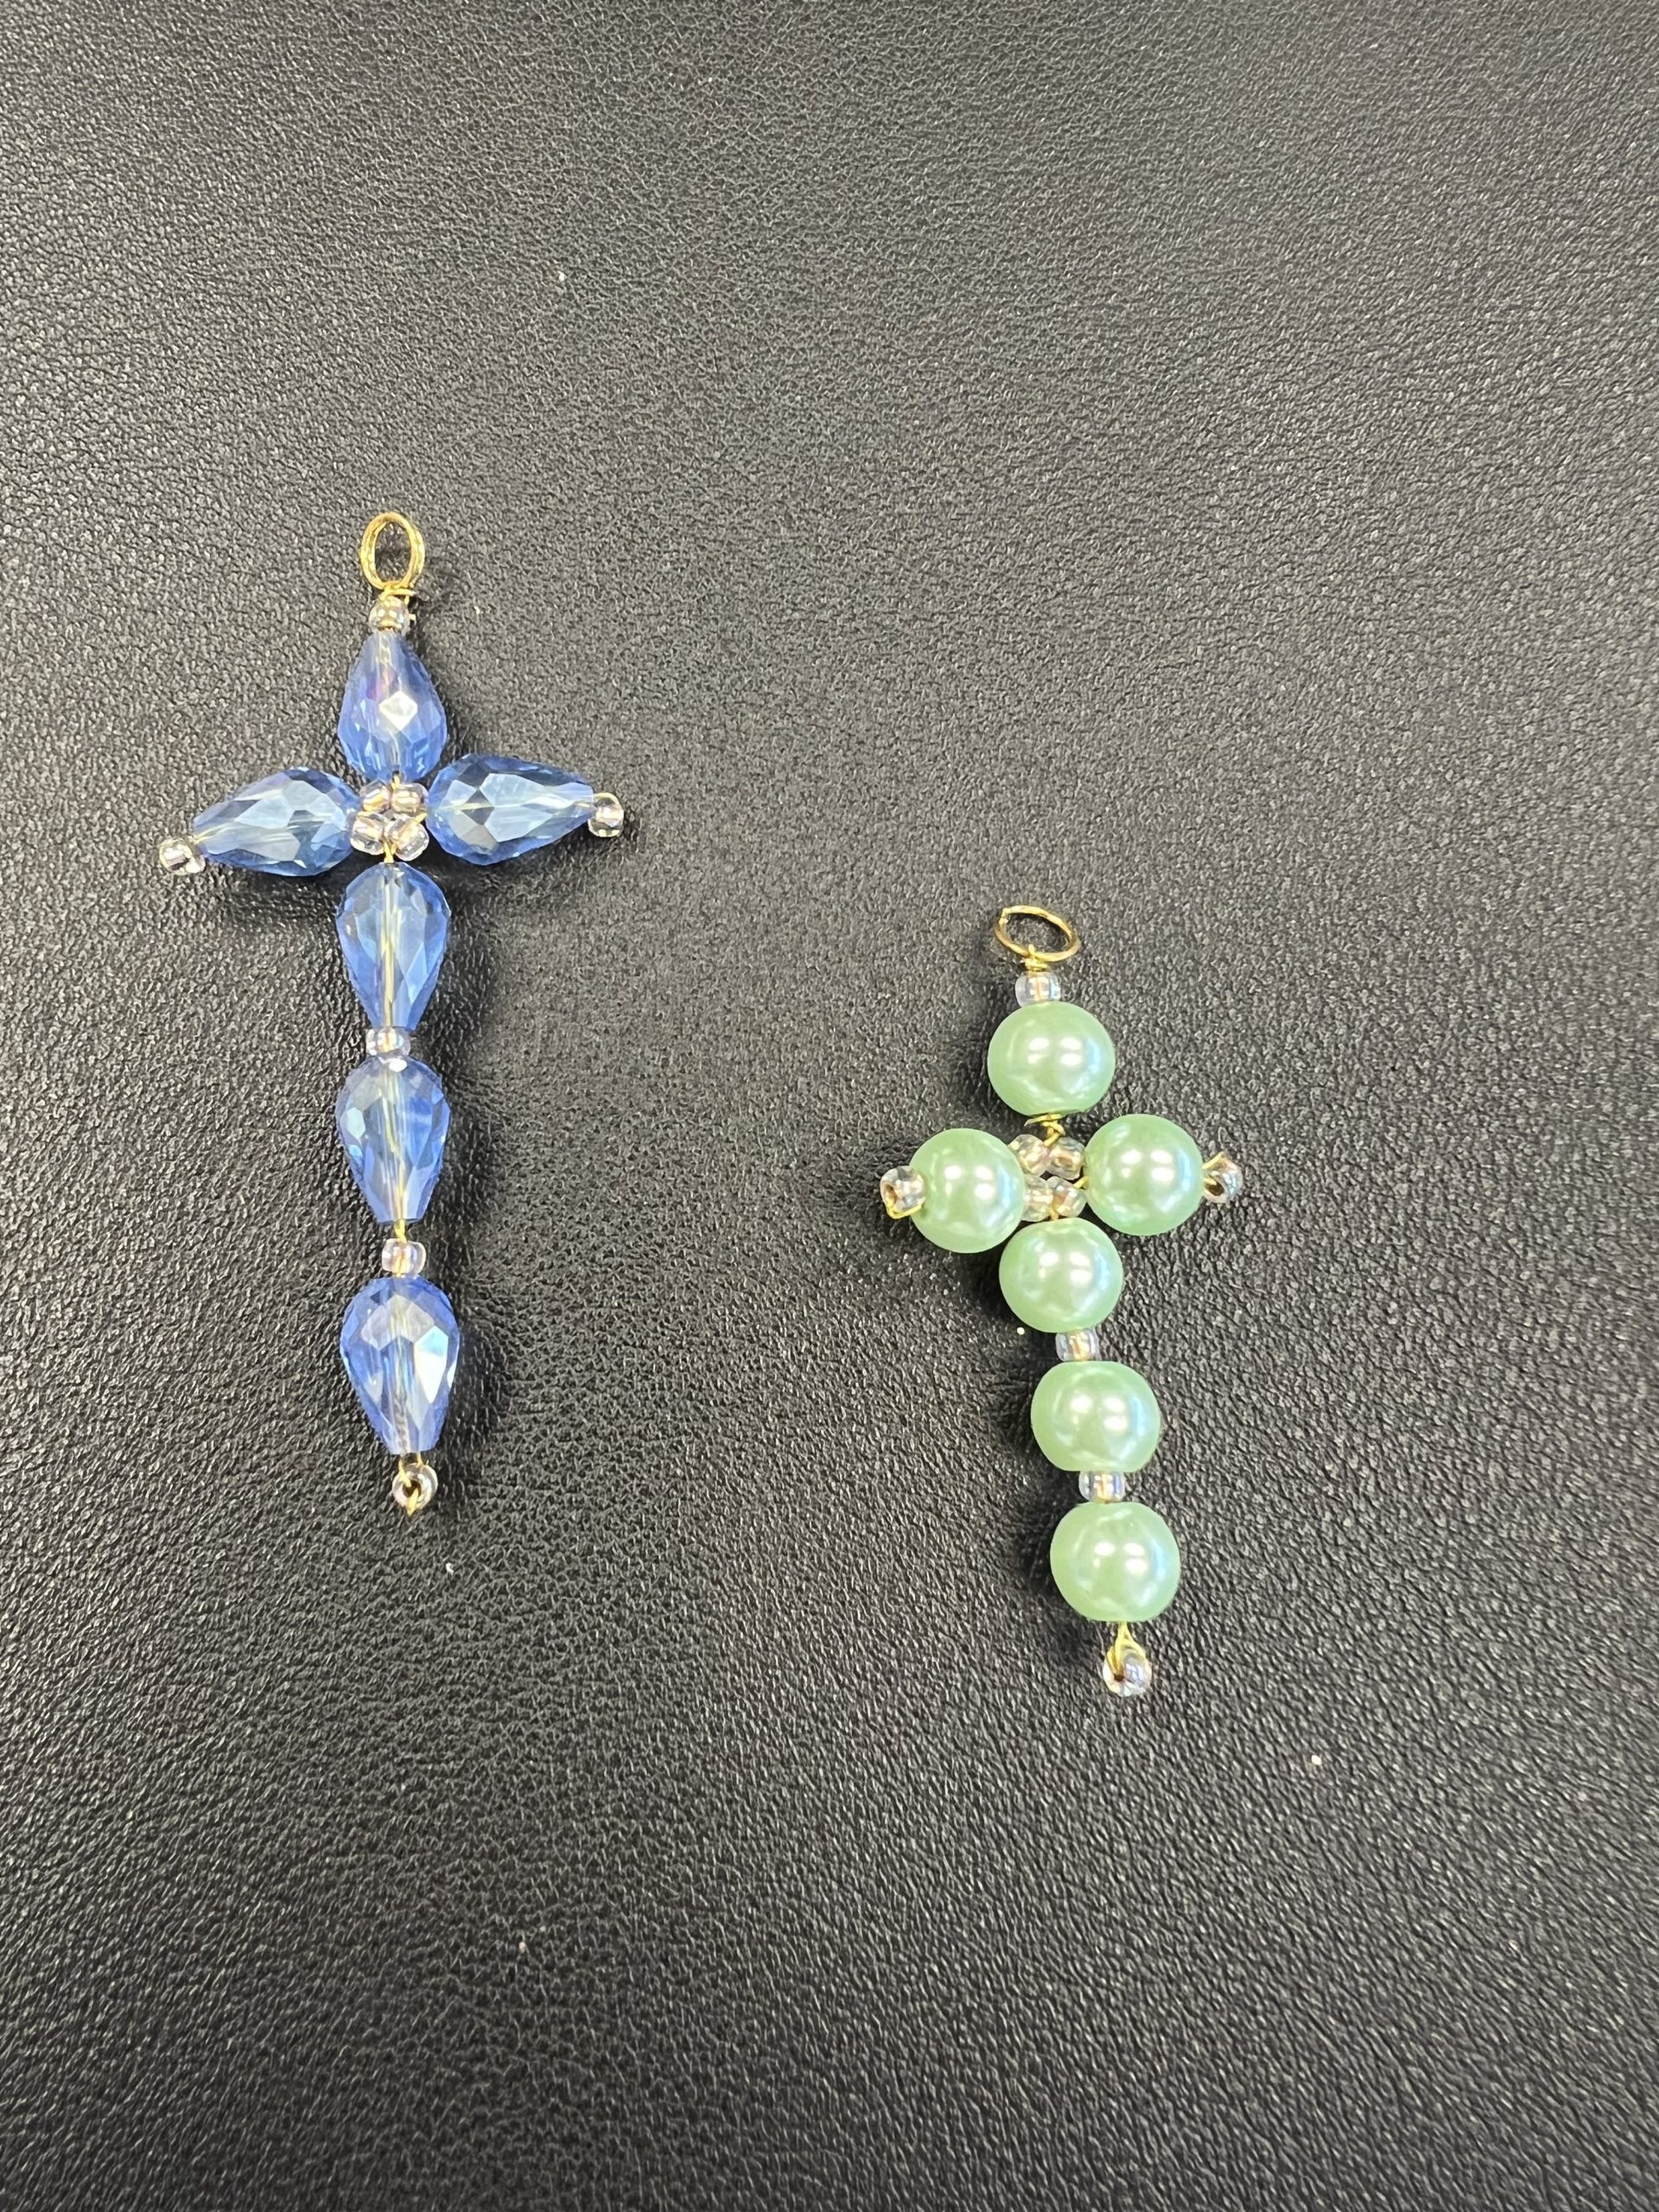
April 2024 Craft: Beaded Cross Necklace Pendant
By Major Harryette RaihlDivisional Women’s Ministries SecretarySouthern California Division Supplies Needed:(6) 6 mm beads (smaller beads or larger beads vary the size of the cross)(10) spacer seed beadsGold/silver jump ring …