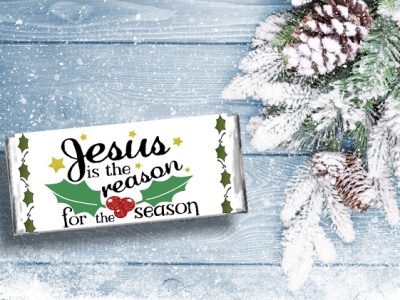
December 2021 Craft: Wise Men Seashell Ornament

Submitted by the Intermountain Division

This craft is incredibly versatile in that it can be adapted for any age and as simple or complex as you would like it to be and adapted to fit any budget.

Some variations include Cardstock with sticker shapes for the Wise Men, Felt and felt pieces, instead of shell for older groups use a piece of stained wood.

Supplies Needed:

  • Half of a large, scalloped seashell (purchase on Amazon or from a local hobby store)
  • Decorative small seashells (purchase on Amazon or from a local hobby story)
  • Hot glue gun with glue sticks
  • 2-inch-think Twine to hang ornament; cut into 5-inch lengths.
  • Strips of fabric or ribbon
  • Materials for floor such as sand, twine, branches, etc.
  • Foam or bead star

Directions:

Step 1: Wipe out large seashell with water and dry thoroughly.

Step 2: Select and sort into groups for Wise Men which small shells you would like to use.

Step 3: Glue down flooring. This can be glitter glue, sand, yarn, etc. I dried corn husks.

Step 4: Glue down Wise Men. Make sure to loop ribbon, fabric etc. around the body before gluing the head and crown. This can be any color or type that you want.

Step 5: Glue down presents. These can be small boxes like I used, square pieces of other material, etc.

Step 6: Glue star to the top of the shell.

Step 7: Wrap twine three times around to create a stronger loop. Put a dab of glue on the side that is being glued to the- shell to hold the pieces together.

Step 8: Glue twine to the back of the shell. To hide the glue on the back of the ornament, choose another shell to place over the area where the twin is affixed.

Allow craft to dry flat for at least 24 hours.

Download printable directions of this craft.

Note: Check out this month’s devotional, A Gift of Significance and the Wise Men Seashell Ornament craft that coordinates with this Bible study.

November 2021 Craft: Edible Thanksgiving Turkeys

Submitted by the Southwest Division

Ingredients
1 cup of chocolate chips or premade chocolate frosting
30 candy corn candies
6 chocolate sandwich cookies
6 mini peanut butter cups
6 malt balls
1 cup of red frosting
6 chocolate sandwich cookies with top cookies removed
Red frosting in a piping bag

Directions:

  1. Place the chocolate chips in a medium stainless steel or glass bowl. Set the bowl over a saucepan of barely simmering water. Cook, stirring occasionally, until the chocolate has melted, about 4 minutes. Set aside to cool slightly. Or to make your life easier, simply use premade chocolate frosting.
  2. For each turkey, push 5 candy corn candies, tip side down, into the cream filling of a chocolate sandwich cookie to make the feathers for the turkey. Lay the cookie on a work surface.
  3. Dip the flat, larger end of a peanut butter cup in the melted chocolate allowing any excess chocolate to drip back into the bowl. Place malt ball above the peanut butter cup to make a head of the turkey.
  4. Dip the flat end of the white candy corn tip into the chocolate. Place on a malt ball, to make the turkey beak. Refrigerate until the chocolate has set, about 10 minutes.
  5. Place the red frosting in a piping bag. Using scissors, cut a small opening in the end of the popping bag. Pipe a small piece of frosting under the malt ball to make the turkey beard.
  6. Place a cookie (with top half removed) on a platter. Stand the turkey upright into the cream filling. Repeat with remaining ingredients.

Note: Check out this month’s Bible Study, 10 Reasons to Praise the Lord, and this month’s devotional, The PERFECT Thanksgiving, which coordinate with this craft.

October 2021 Craft: Sand Jar Craft

By Lt. Mony Oregel
Stockton, CA Corps – Del Oro Division

Supplies Needed: (You can find everything from your local dollar store)

  • A container – glass or plastic with a wide mouth
  • 3-4 different colored sands (1 should be a neutral, natural color of sand)
  • A spoon
  • A funnel
  • An artificial succulent or any flower of your choice
  • Seashells and/or craft rocks

Check out the following videos for detailed instructions on how to make this craft.

Sand Craft part 1:

Sand Craft part 2:

Note: Check out this month’s Bible study, Seeds of Potential, and this month’s devotional, I See You. God Sees You. You Matter, that coordinates with this craft.

September Craft: Rolled Paper Roses

By Major Ronda Gilger
Coeur d’Alene Kroc Center, ID – Northwest Division

Pure inspiration!

Learn a simple technique with so many applications.

We’ve added everything you need to make sure that your group has a wonderful experience as they work together around the tables. Truly, some of the best ministry moments are experienced as women share their stories as they create these simple paper roses. And you will be so inspired as you look through the presentation and see how many applications there are for this lovely paper rose.

Will you create a masterpiece for your walls, or scatter them around a table? Perhaps just a few set inside and around the saucer of your teacup.  Imagine events with these inspired decorations, wreaths, or something as practical as cards, tags or package décor. 

This is a craft that can be taught across genders and generations, with relatively low cost which makes this internationally attractive as well.  Share-far and wide!

What you’ll need:

  1. paper (scrapbook paper is good, cardstock has a nice weight-or use a page from a novel, a songbook or ??? so many options!),
  2. scissors,
  3. and a hot glue gun.

In the Video Tutorial you will hear a variety of ideas for Women’s Ministries, as well as tips for leading this craft. 

For any of your women who may be home bound- this might also be a perfect way to share a link with them which they can follow along doing the same craft project as your other women.

Download the 2 page (2 sided) Tutorial handbook which can be printed for each woman in your group.

September Bonus Craft: Tin Can Birdseed Feeder

By Major Ronda Gilger
Coeur d’Alene Kroc Center, ID – Northwest Division

Our women need to hear about how God is working in our lives. It encourages them to look at how God is working in theirs! 
IDEA: Why not try to make a Mod Podge Tin Can Birdseed feeder?

Look at the birds of the air; they do not sow or reap or store away in barns, and yet your heavenly Father feeds them. Are you not much more valuable than they? Can anyone of you by worrying add a single hour to your life? Matthew 6:26-27 NIV

Worry. We’re consumed by it… distracted, depressed, and we’ve lost focus. Take a few moments to create this simple Birdseed feeder, reminding yourselves that God, who clothes the most beautiful flowers; and who feeds the birds, who sees the smallest sparrow when it falls… This same God has your life in his hands. He is faithful and loving and is right there with you in your times of joy and greatest heartache.

DIY “Tin Can Birdseed Feeder Instructions:
Materials:
Scissors, paintbrushes, misc scrapbook papers, twine, and 3 opened-cleaned-cans with labels removed.

Have each woman bring in a few cans- or collect them just for this special program together.

Using ModPodge (there is a variety that holds up better outside), a paintbrush, and fun papers add to your masterpiece-one paper at time to decorate your Birdseed hanging feeders. Wrap twine around several times and create a hanger as shown.  You can see that they look even better in groupings! 

I believe that this can be a fun project to bring women, families or children together…. or even for you to invite neighbors in for.  Remind everyone of these verses in Matthew, and HAVE EACH PERSON tell of a time when God worked in their lives- you will be surprised by how encouraged you will all be! 

Pray just before you leave. Perhaps you can even have your women hold hands in a circle – to visually show the unity you feel for one another. What fun!

July Craft: Mod Podge Boxes

By Major Gaylene Yardley
Metro Phoenix Resource Officer – Southwest Division

Supplies

Boxes of any shape or size
Modge Podge Matte
Old pictures
Paint
Spray gloss Modge Podge
Paint brushes

Instructions

  • Paint your box with any color you like.
  • Cut out the pictures you plan to adhere to your box.
  • Using a clean paint brush, brush the Modge
  • Podge onto the box wherever you are going to adhere pictures.
  • Brush Modge Podge liberally onto the picture and adhere to the box.
  • When the photos are dry, spray entire box with the Modge Podge gloss and let dry.
  • Enjoy your box!

Download printable instructions of this craft

May Craft: Dress Shirt Apron

March Craft: Layers – A Scrapbooking Project

February Craft: Coffee Filter Flowers