[av_textblock size=” font_color=” color=” admin_preview_bg=”]
Joyful Fall Wreath
By Captain Jan Pemberton
Divisional Women’s Ministries Secretary, Alaska Division
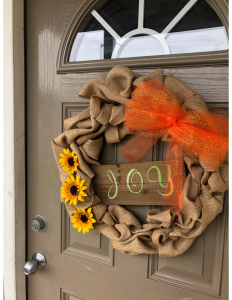
Fall is a beautiful time of year. We have leaves falling, the air is a little crisper, and the smell of everything pumpkin spice is in the air. During this time of year, they may love decorating their homes with beautiful fall decorations such as pumpkins and a wreath on the door. What a fantastic way to show others our JOY of not only the season but the JOY of the Lord! During this project, think of ways that the Lord gives you JOY and how you can help others find theirs. Have fun with this project either as a solo project or with a group of friends. However, you decide to take on this project, do it with JOY!
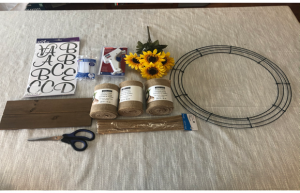
What you need to make a fall burlap wreath:
- Burlap Garland or Ribbon- 2 rolls (20 feet each)
- 18″ Wire Wreath Frame
- Floral Wire
- Pipe cleaners
- Scissors
- Hot Glue Gun
- Glue sticks
- Fall accents (I used flowers and a bow; download the PRINTABLE INSTRUCTIONS on how to make the bow)
How to make a fall burlap wreath:
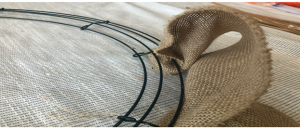
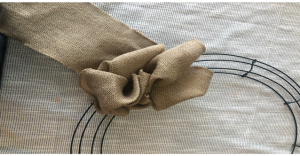
Step 1: Attach burlap to wire wreath frame.
Take the end of your burlap ribbon and fold it into quarters.
Cut a piece of the floral wire and attach the burlap to the wire wreath frame on the innermost circle of the frame.
Step 2: Loop the burlap through the wire wreath form.
Starting with the innermost ring. Push the burlap through the wire wreath. Making a bubble loop with the burlap like below.
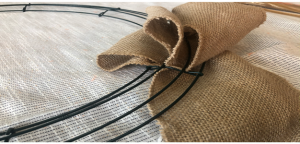
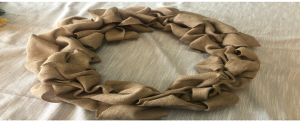
Step 3: Bunch the loops on the wire wreath form.
As you make three loops, one in each of the sections of the wire form. Bunch the three loops against the vertical part of the wire wreath, so you can have 2 sets of 3 loops in each section of the wreath form. This is how you will get the full look of the wreath.
Step 4: Twist the burlap on the underside of the wreath.
After you have looped the burlap through the three sections of the wire wreath form, twist the burlap on the underside of the wreath.
Each time you make the three loops, you will need to twist. Then repeat the loops, twist, repeat loops, and so on. Until you get a full looking wreath. For this project, I used 1 ½ spool of burlap garland; if your wreath is smaller less maybe needed.
Step 5: Secure the ends of the burlap to the wire wreath form.
When you reach the end of your burlap garland or ribbon, you will need to again fold your burlap in quarters. Then fasten it to the wire from the floral wire. You will tuck it behind your wreath, so it is not noticeable.
Choose your fall embellishments. Just position them on your wreath and attach it with hot glue or floral wire.
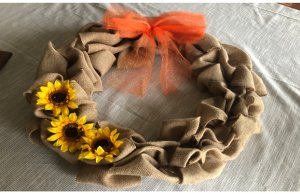
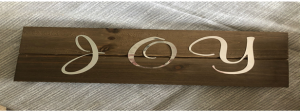
Final Touch
Take an 8-10 inch piece of wood, if you have a Circuit, you can use it to cut JOY into vinyl, another option is using acrylic paint to paint the word JOY or use pre-cut words and adhere them to the wood. This is a preference on which method works for you. Be sure to secure the sign by attaching tacks on each side, 1 or 2 on each side should work, then connecting to the wire wreath with floral wire or pipe cleaners.
After your project is completed, hang your wreath on the door to display your JOY for everyone to see.
Download the PRINTABLE VERSION of this craft.
Note: Also on our website is JOY: A 4-WEEK BIBLE STUDY and JOYFUL RESTORATION devotional that coordinates with this craft.
[/av_textblock]
 October Bible Study: Joy